Stacking Appliances in Cabinets
The information in this article applies to:

QUESTION
I need to place stacked appliances in a cabinet, however, a message says I can only have one appliance per cabinet. How can I model this in Home Designer?
ANSWER
Some stacked appliances, such as stacked wall ovens, can already be located in the Library Browser. In Home Designer Pro, multiple appliances can be placed in a single cabinet, however in Home Designer Suite and Home Designer Architectural, you must create separate cabinets, with each containing an appliance to give them the appearance of being in a single cabinet.
In this article, we will create separate cabinets with appropriate dimensions, insert appliances into each one, and then stack them together.
To create the cabinet for the microwave
- Launch Home Designer and select File> New Plan
 .
.
- Select Build> Cabinet> Wall Cabinet
 , click in the plan to place it, select it, and click on the Open Object
  edit button.
- On the General panel of the Wall Cabinet Specification dialog that displays:
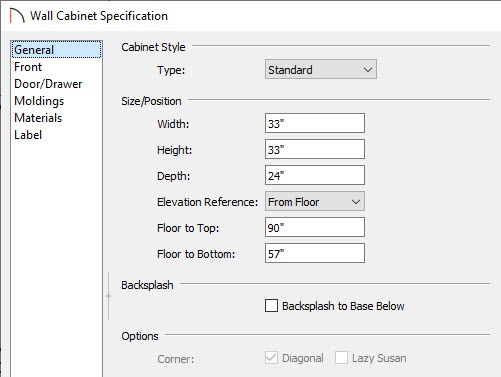
- Set the Width, Height, and Depth.
In this example, the Width and Height are both set to 33" and the Depth is set to 24".
- Set the Floor to Top or Floor to Bottom value.
In this example, the Floor to Bottom is set to 57".
- Click OK to apply these changes.
- Set the Width, Height, and Depth.
- Navigate to View> Library Browser
 to open the Library Browser if it's not already open, and browse to the appropriate appliance that you want to place in the uppermost part of the cabinet.
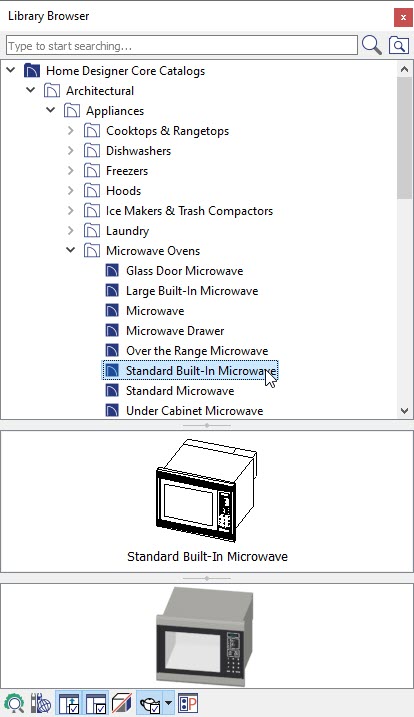
For the purposes of this example, we will browse to Architectural> Appliances> Microwave Ovens> Standard Built-In Microwave.
- Once you have the appropriate item in the Library Browser selected, click on the wall cabinet to place the built-in appliance in it.
We have now completed the topmost of the three cabinets we will be stacking together.
Note: If you had not already increased the Width of this cabinet, you would receive a warning that the cabinet is not large enough to hold the fixture/appliance.
To create the cabinet for the wall oven
- Select Build> Cabinet> Base Cabinet
 then click off to the side of your existing Full Height cabinet to place it in floor plan view.
- Once placed, select the cabinet and click on the Open Object
 edit button.
- On the General panel of the Base Cabinet Specification dialog that displays:
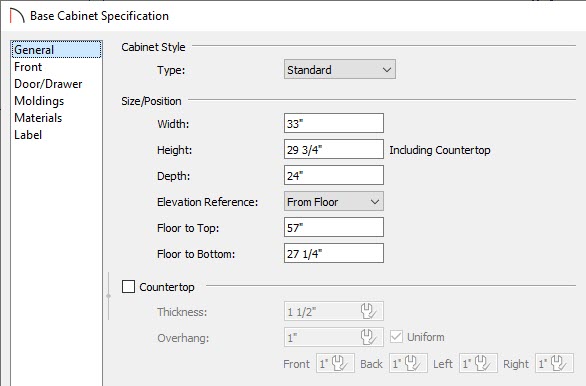
- Set the Width, Height, and Depth.
In this example, the Width is set to 33", Height is set to 29 3/4", and the Depth is set to 24".
- Set the Floor to Top or Floor to Bottom value.
In this example, the Floor to Bottom is set to 27 1/4"
- Uncheck the Countertop checkbox.
In Home Designer 2020 and prior versions, set the Thickness of the Countertop to 0" instead.
- Set the Width, Height, and Depth.
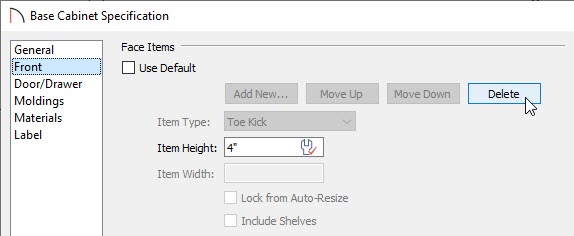
- Select the toe kick in the 3D preview of the cabinet that displays on the right side.
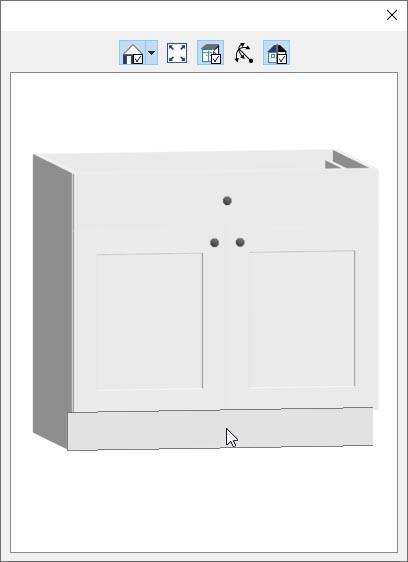
- The Front panel will now be active. Click the Delete button to remove the toe kick, then click OK to apply the changes and close the dialog.
- Navigate to View> Library Browser
 to open the Library Browser if it's not already open, and browse to the appropriate appliance that you want to place in the uppermost part of the cabinet.
For the purposes of this example, we will browse to Architectural> Appliances> Wall Ovens> Standard Single Oven.
- Once you have the appropriate item in the Library Browser selected, click on the base cabinet to place the built-in appliance in it.
We have now completed the middle of the three cabinets we will be stacking together.
To create the cabinet for the warming drawer
- Select Build> Cabinet> Base Cabinet
 then click off to the side the previously placed base cabinet which contains the wall oven.
- Once placed, select the cabinet and click on the Open Object
 edit button.
- On the General panel of the Base Cabinet Specification that displays:
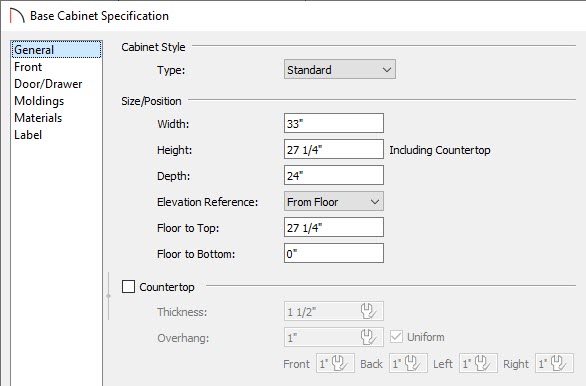
- Set the Width, Height, and Depth values.
In this example, the Width is set to 33", the Height is set to 27 1/4, and the Depth is set to 24".
- Leave the Floor to Bottom value set at 0".
- Uncheck the Countertop checkbox.
In Home Designer 2020 and prior versions, set the Thickness of the Countertop to 0" instead.
- Click OK to apply these changes to the cabinet.
- Set the Width, Height, and Depth values.
- Navigate to View> Library Browser
 to open the Library Browser if it's not already open, and browse to the appropriate appliance that you want to place in the uppermost part of the cabinet.
For the purposes of this example, we will browse to Architectural> Appliances> Wall Ovens> Warming Drawer.
- Once you have the appropriate item in the Library Browser selected, click on the base cabinet to place the built-in appliance in it.
- After the warming drawer is placed in the base cabinet, use the Select Objects
 tool to select it, and click on the Open Object
  edit button again.
- In the Base Cabinet Specification dialog that displays, select the warming drawer appliance in the 3D preview.
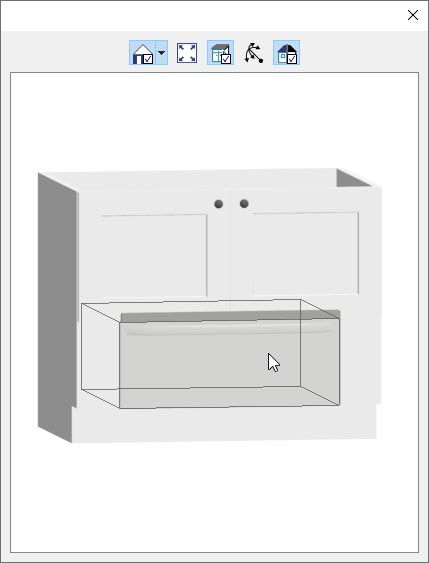
- The Front panel will now be active and the drawer will be highlighted. Click the Move Up button until the drawer is at the top of the cabinet, then click OK to apply the changes.

Now that you have created all of your cabinets and placed the appliances in them, you are ready to stack these cabinets.
To stack the cabinets
- Select 3D> Create Camera View> Cross Section/Elevation
 then click and drag a view towards the front of the cabinetry.
- Using the Select Objects
 tool, select the middle cabinet, and use the Move
  edit handle to drag it over the top of the bottom cabinet.
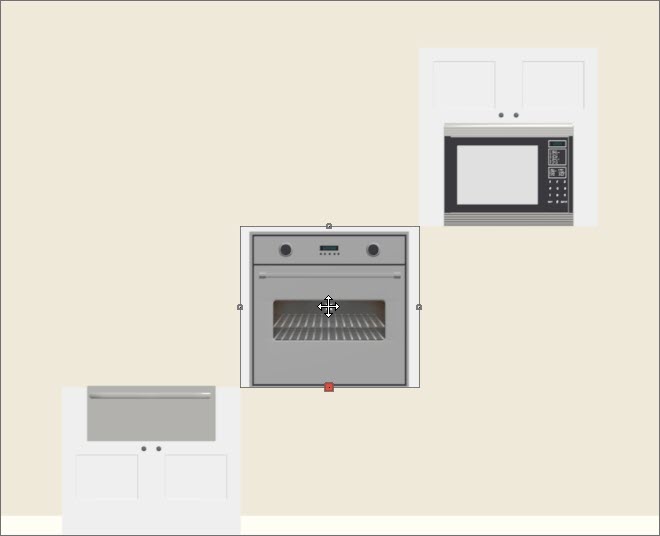
- Next, move the topmost cabinet above the two other cabinets, so that you create the appearance of a single cabinet with three appliances.
- Lastly, take a Full Camera
 view to see the results.
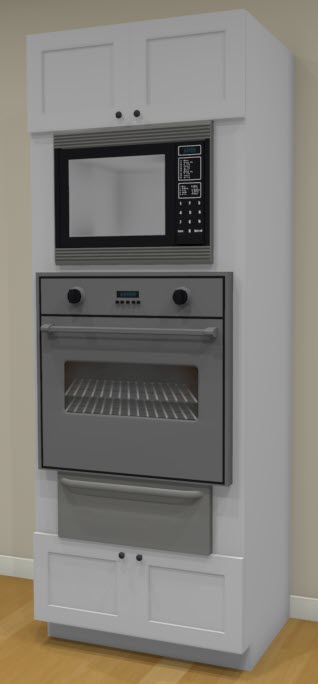
While in floor plan view, you can hold down the Shift key on your keyboard, click and drag to create a marquee around all three of the cabinets, and then move them as a single unit to precisely position them in a plan.