Creating Beams in Home Designer Pro
Reference Number:
KB-00458
Last Modified:
July 21, 2021
The information in this article applies to:

QUESTION
How do I add a beam to my plan in Home Designer Pro?
ANSWER
Floor, ceiling, and roof beams can be created with the framing tools.
Setting up beam defaults
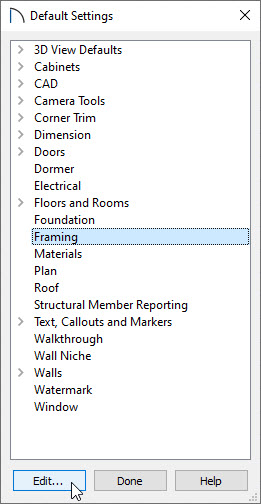
- From the menu, navigate to Edit> Default Settings
 , select the Framing category, then click Edit.

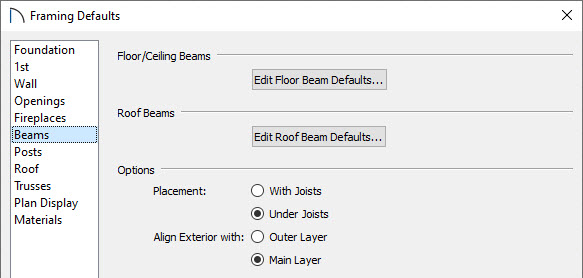
- In the Framing Defaults dialog which opens next, select the Beams panel:

- Click the Edit Floor Beam Defaults button to edit the properties for the Floor/Ceiling Beam tool.
- Click the Edit Roof Beam Defaults to edit the properties for the Roof Beam tool
- Specify the Placement of Floor/Ceiling Beams relative to the joists. With Joists places beams at the same height as the joists they hang on the beams; Under Joists places beams below joists so they bear on the beams.
- The exterior surface of Beams can snap to the Outer Layer of the wall it bears on or the Main Layer.
- Click the Edit Floor Beam Defaults button to edit the properties for the Floor/Ceiling Beam tool.
- Once all desired changes have been made, click OK and Done to close the dialog boxes.
Creating floor, ceiling, or roof beams
- From the menu, select Build> Framing> Roof Beam
 or Build> Framing> Floor/Ceiling Beam
  , depending on the type of beam that you want to create.
Note: Roof Beams are typically drawn across rafters and placed directly under them.
Floor/Ceiling Beams should be placed before joists are automatically generated.
- Once you have selected the appropriate menu item, you will be able to click and drag in a plan view to create the beam.
The beams that you create in Home Designer Pro using this method will be visible in plan view, but may need to have the display of Framing in Display Options turned on to be visible in 3D camera views
Related Articles