Using Terrain Walls to Create Solid Hedges
The information in this article appliesto:

QUESTION
I would like to create a continuous hedge to create a fence around my lot. How can I do this in Home Designer?

ANSWER
While there are a variety of tools available for creating hedges in your plan, such as by placing Plants from the Library Browser, the easiest of these are the Terrain Wall tools, as they will follow the contours in the terrain.
In this example, we will show you how to place, edit, and apply a material to a terrain wall to create a solid hedge.
To create a continuous, solid hedge
- First, launch your Home Designer software and Open
 the plan in which you want to place the hedge.
- Next, select Terrain> Walls and Curbs> Straight Terrain Wall
 and click and drag in your 2D floor plan view to create your initial terrain wall.
Continue drawing in all of your Terrain Walls approximately where you would like your hedges placed. You can leave spaces in between these to allow for openings.
- Once you have finished placing all of your terrain walls, select one and click on the Open Object
 edit tool to display its specification dialog.
- On the General panel, for the purposes of this example, increase both the Width and the Terrain to Top of the terrain wall.
In this example, the Width is set to 24" and the Terrain to Top is set to 60".

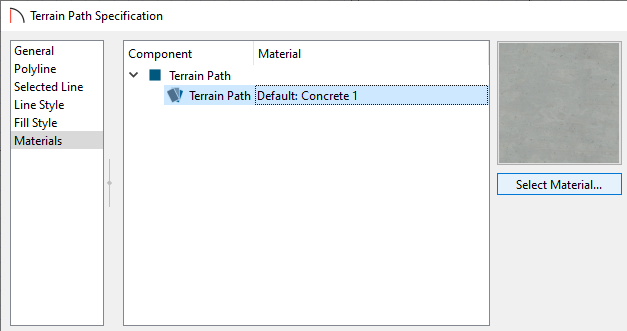
- Next, select the Materials panel, click on the Terrain Path component, then click on the Select Material button.

- In the Select Materials dialog, navigate to an appropriate material to use for your hedges, select it, then click OK.
For the purposes of this example, we browsed to Materials> Landscaping> Grass & Ground Covers> Ivy 3
If you want to import a material from an outside source for your hedges, make sure that it will tile well once applied to the terrain wall's surface.
- Once you have completed making your changes, click OK to exit the dialog and repeat the process for any other unconnected Terrain Wall segments in the plan.
- Lastly, take a Full Camera
 view to see the results.