Creating a Custom Glass Shower
The information in this article applies to:

QUESTION
How can I create a custom glass shower enclosure?

ANSWER
Several already existing shower and bathtub combinations, as well as enclosures, can be located in the Library Browser. Alternatively, custom glass showers can also be created using the Glass Wall tools or by changing walls to use the Glass Shower wall type.
To create glass shower walls
-
Open
 a plan that you'd like to create a custom glass shower within and focus in on the bathroom.
- Select Build> Wall> Straight Glass Wall
 and place glass walls to form a glass shower enclosure.
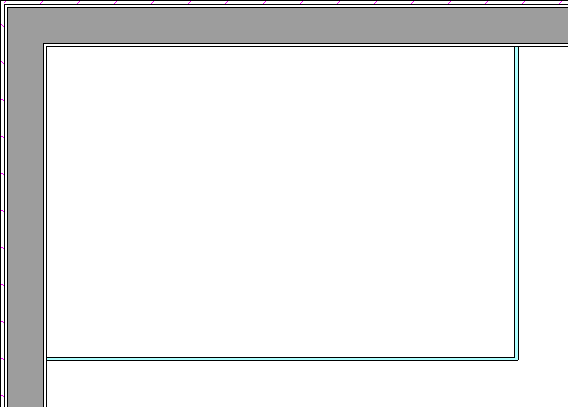
A Glass Pony Wall tool is also available in Home Designer Architectural and Home Designer Pro, and may be used in situations where you may want a wall that is framed on the bottom and glass on the top.
- Make any further adjustments such as the type of glass you'd like to use, as well as the position of the glass walls.
Note: You can also adjust the height of the shower if it's defined as it's own room, by adjusting the Floor value located on the Structure panel of the Room Specification dialog.
To add a glass shower door
- Select Build> Door> Shower Door
 and click within a glass wall to place a glass shower door.
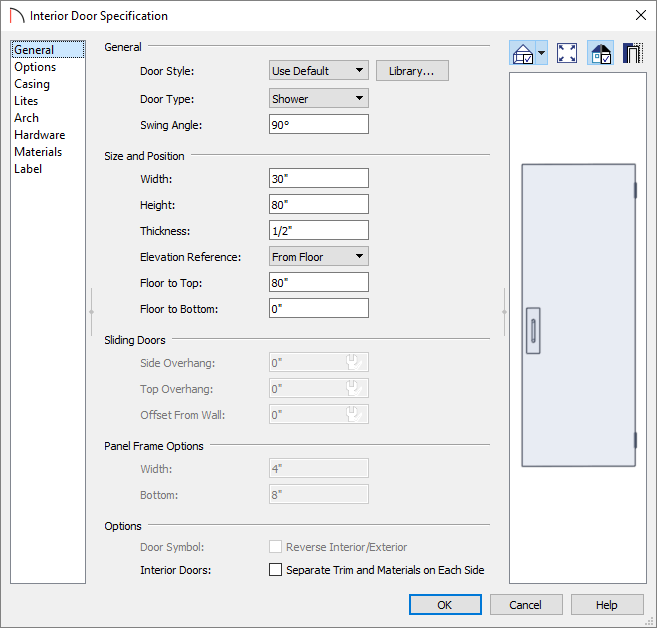
- Once the door is placed into a glass wall, select it and click on the Open Object
 edit button.
- In the Door Specification dialog that opens, make any desired adjustments, then click OK.
Fixtures can now be added to complete the space. Navigate to Home Designer Core Catalogs> Architectural> Plumbing Fixtures within the Library Browser ![]() to find faucets, shower pans, and other fixtures to place into your custom shower. Additional libraries containing more shower fixtures and hardware can also be purchased from the 3D Library.
to find faucets, shower pans, and other fixtures to place into your custom shower. Additional libraries containing more shower fixtures and hardware can also be purchased from the 3D Library.
For more information on acquiring Library Content, please see the Related Articles section below.
You can also create glass showers using a variety of 3D objects located within the library, as well as using other wall tools and wall properties such as the Custom Backsplash feature. Please view the examples below to learn more about creating different glass shower concepts within Home Designer.
EXAMPLE 1
-
Different glass materials can be found by navigating to Home Designer Core Catalogs> Materials> Glass & Glazing.
You can also make copies of materials and change their transparency or texture to create new glass materials, or import materials from an outside source.
- Glass shower enclosures such as the one seen in the image above can be found by navigating to Home Designer Core Catalogs> Architectural> Plumbing Fixtures> Enclosures.*
*Available in Home Designer Architectural and Home Designer Pro.
Simply select the enclosure that you want, and click in your plan to place it. It can then be further adjusted using its edit handles in both 2D and 3D views.
-
Tile Materials, which can be applied to wall coverings or to a walls surface, can be found by navigating to Home Designer Core Catalogs> Materials> Tile.
-
Half Height Walls can be created by selecting Build> Wall> Straight Half-Wall
 .
.
For more information on half walls, partial height walls, or customizing materials please see the Related Articles section below.
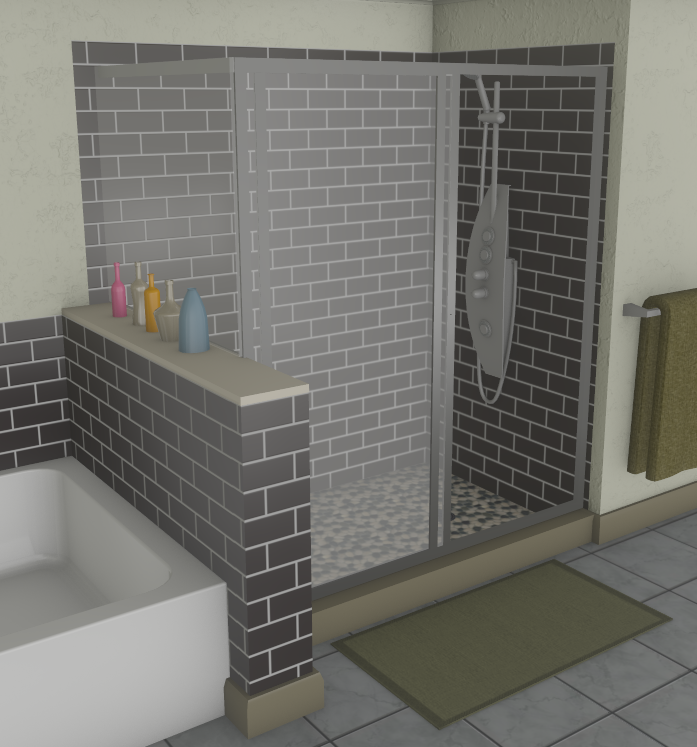
EXAMPLE 2

- In the example above, a glass block shower was created using two Straight Half-Walls sections joined by a Curved Half-Wall
 at the corner to create a shower room, which is separate from the rest of the bathroom area.
Once the half walls were placed, the height was raised by accessing the specification dialog, and the Glass Blocks material was applied by navigating to Home Designer Core Catalogs> Materials> Glass & Glazing> Textured Glass.
The floor value for the shower room was also raised 6" so that the base molding applied to the bathroom would wrap around it.
-
Grab bars can be found in the Accessible Design Bonus Catalog.
-
Custom Backsplashes
 can be used to add materials to portions of your walls or an entire room. This is especially helpful if you would like a tile material to span a specific height. In the image above, neither the tile in the shower room nor the tile in the bathroom itself reaches all of the way up to the wall, as custom backsplashes are applied.*
*Custom Backsplashes are only available in Home Designer Architectural and Home Designer Pro.
EXAMPLE 3
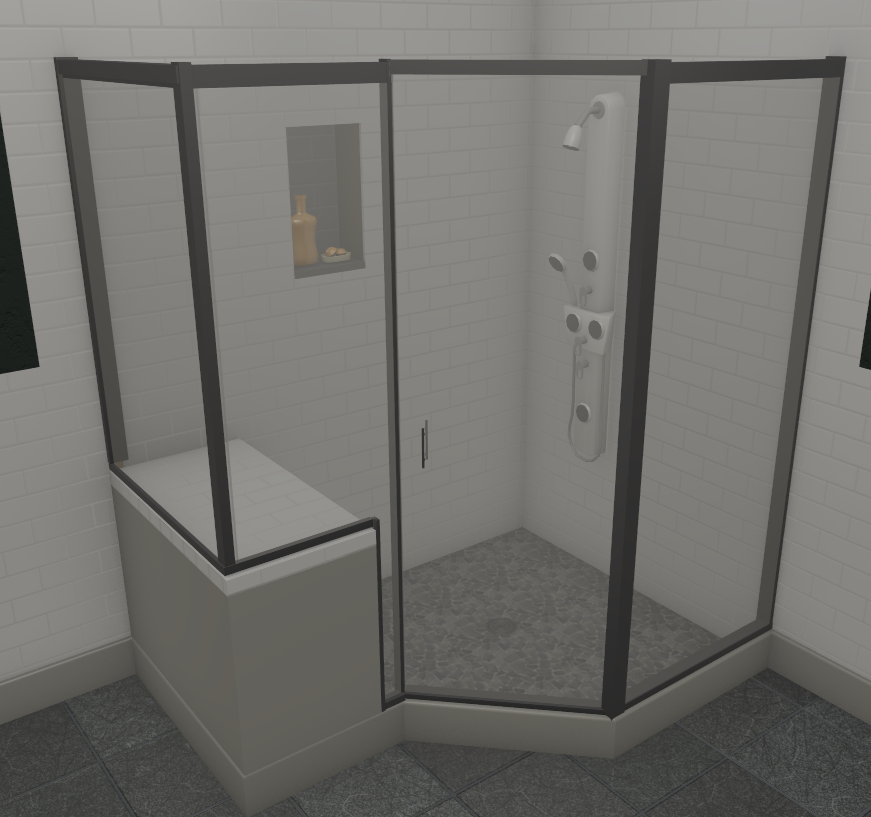
- Unlike the prior example, this shower has tile all of the way up to the ceiling. Instead of using custom backsplashes here, we changed the material of the Interior Wall Surface of the wall in the Wall Specification dialog. To make it not change the entire wall, we placed a break in the walls on either side of the shower using the Add Break
 edit tool.
-
The shower seat in this example was created using a Closed Box located by accessing Home Designer Core Catalogs> Shapes> Boxes within the Library Browser. An additional box was placed on top and a tile material was applied to it to within its specification dialog.
-
Navigate to Build> Window> Wall Niche
 to place a niche, or alcove into a shower wall.