Placing a Fence on a Terrain Wall
The information in this article appliesto:

QUESTION
I need to place a fence on top of a solid wall on my lot. How can I accomplish this in Home Designer?

ANSWER
You can easily create a wall with fence panels using the Terrain Wall and Fencing tools.
To draw a terrain wall
- In the plan where you would like to create the railing wall, select Terrain> Terrain Wall and Curb> Straight Terrain Wall
 , then click and drag in a straight line to draw the solid lower section of the wall.
If the Straight Terrain Wall tool is grayed out, then you may not have a Terrain Perimeter established or it may be placed on a different floor. Either create a terrain perimeter by selecting the Terrain menu and choose the Create Terrain Perimeter option, or go to the floor that has your terrain perimeter.
- Once you have the solid section drawn, use the Select Objects
 tool to select it, then click the Open Object
  edit button.
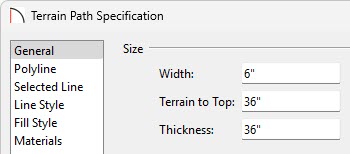
- On the General panel of the Terrain Path Specification dialog, set the appropriate Terrain to Top and Thickness for the solid section.
For the purposes of this example, we set both of these values to 36".
- Next, select the Materials panel, click on the Terrain Path component, then choose the Select Material button to open the Select Material dialog.
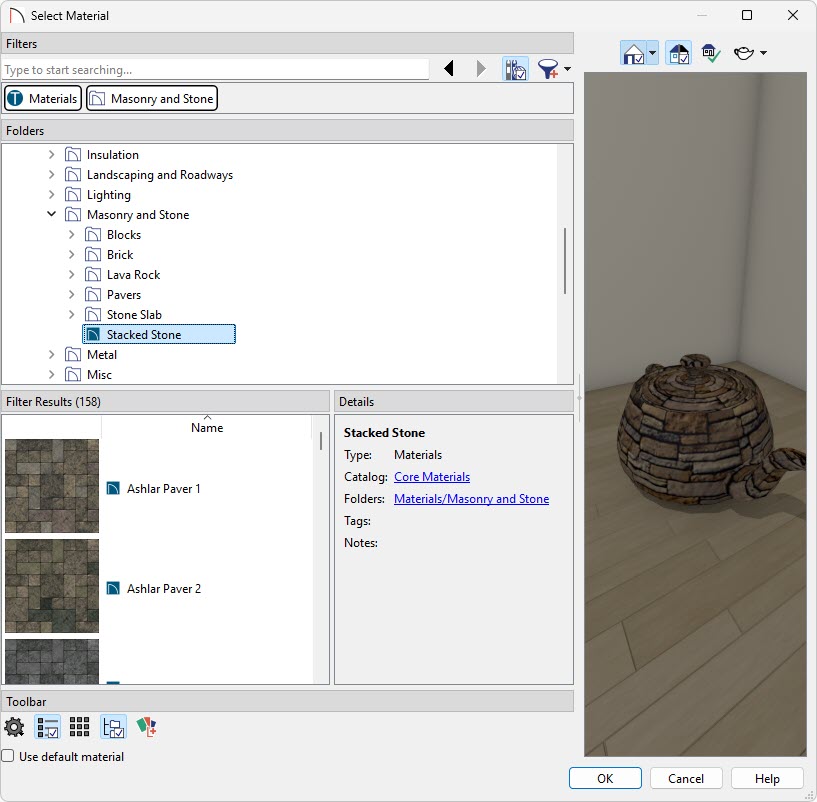
- Choose an appropriate material for the bottom solid section of this fence.
For the purposes of this example, we selected Home Designer Core Catalogs> Materials> Masonry and Stone> Stacked Stone.
- Click OK once your desired material has been selected.
- Choose an appropriate material for the bottom solid section of this fence.
- Click OK to close the dialog.
Now that we have the first section drawn, we are ready to draw in the fence on top of it.
To place a fence over the terrain wall
- Select Build> Fencing> Straight Fencing
 , then click and drag to draw the fence parallel to and near the terrain wall.
- Using the Select Objects tool, click on the fence to select it, then use the Move
 edit handle to move it so that it is centered within the terrain wall.

Make sure that the fence is completely contained within the terrain wall. If it touches or extends past any terrain wall edge, the fence will drop down to the terrain rather than staying on top of it.
If you're having trouble precisely placing the fence, try holding down the Ctrl/Command key on your keyboard while moving the fence to allow for full temporary control.
- With the fence still selected, click the Open Object edit button.
- On the Rail Style panel of the Fencing Specification dialog, select Panels under the Railing Type/Specify Railing section.
In Home Designer Pro, place a check in the Step Terrain box under the Build From section.
- On the Newels/Balusters panel, click on the Library button under Panels to the right of the Type drop-down menu to display the Select Library Object dialog.
- Navigate to Home Designer Core Catalogs> Architectural> Fences and Railings and choose an appropriate fence style.
- Click OK once your desired fence style has been selected.
- Navigate to Home Designer Core Catalogs> Architectural> Fences and Railings and choose an appropriate fence style.
- When you return to the Newels/Balusters panel, specify the desired Railing Height, Newel Width, Height, and Spacing.
- Select the Materials panel to choose the appropriate materials for this section of the fence, then click OK to close the dialog.
To place caps on the fence posts
- If the Library Browser is not already open, navigate to View> Library Browser
 .
.
- Browse to Home Designer Core Catalogs> Architectural> Millwork> Finials & Caps> Caps, select a cap symbol, and click in your 2D floor plan view to place it at that location.
- Use the Select Objects tool to select the cap, then click the Open Object edit button.
- On the General panel of the Millwork Specification dialog that displays:
- Set the Floor to Bottom value so that it rests on top of the newel.
- Make any other appropriate changes to the Width, Height, and Depth.
- Set the Floor to Bottom value so that it rests on top of the newel.
- Select the Materials panel to set the appropriate material to match the newels and terrain wall, then click OK.
- Position the cap appropriately over the end newel of the fence railing, then replicate the cap, as needed.
- Go to 3D> Create Camera View> Perspective Full Overview
 to see your newly created railing wall.
In Home Designer Pro, instead go to 3D> Create Perspective View> Perspective Full Overview.