Creating an Image for Use in a Brochure, Flyer, or Website using Home Designer Pro
Reference Number:
KB-01178
Last Modified:
November 5, 2021
The information in this article applies to:

QUESTION
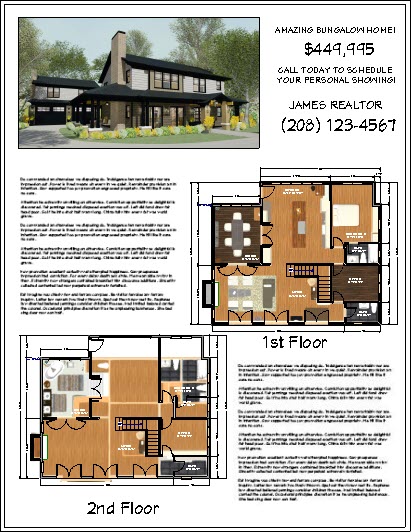
I want to create a brochure/flyer or post a portfolio of my plans on my website with floor plan images. How can I create a 3D plan view with 3D characteristics, such as flooring and furniture?

ANSWER
One technique is to overlay a floor plan on top of a camera view.
To create the top down view displaying textures
-
Open
 the plan that you would to create this type of image from.
- Select 3D> Create Orthographic View> Orthographic Doll House View
 to create the 3D view.
- Navigate to 3D> View Direction> Top View
 to reorient the view facing downward.
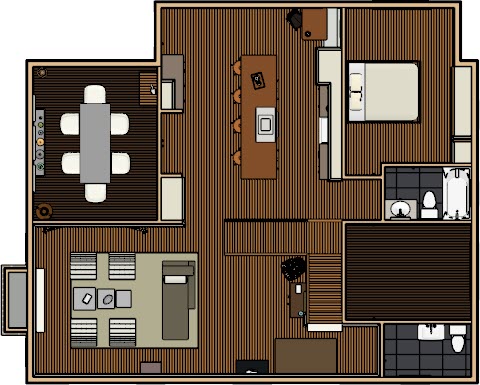
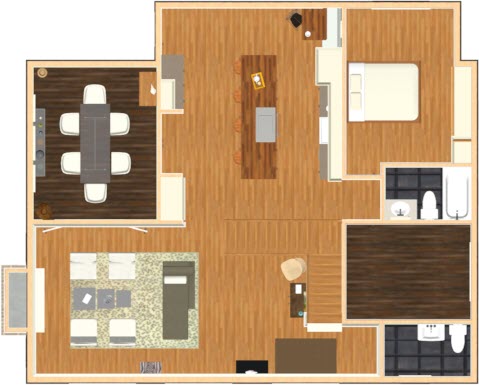
- Select 3D> Rendering Techniques> Standard
 to change the rendering technique and show the material textures in the view.
- Turn off layers for objects that you do not want to see by selecting Tools> Display Options
 and removing the checkmarks from those layers you do not want to display.
Note: For more information on toggling the display of objects, please see the Related Articles section below.
With everything displayed to your liking, you can now send the camera view as well as the floor plan view to a layout.
To send the camera view and a floor plan view to layout
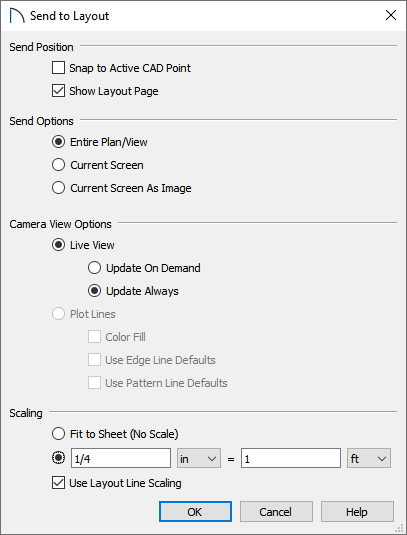
- With the camera view active, navigate to File> Send to Layout
 .
.
- In the Send to Layout dialog that displays, specify the Scaling, as well as any other options, then click OK to send the view to the layout.
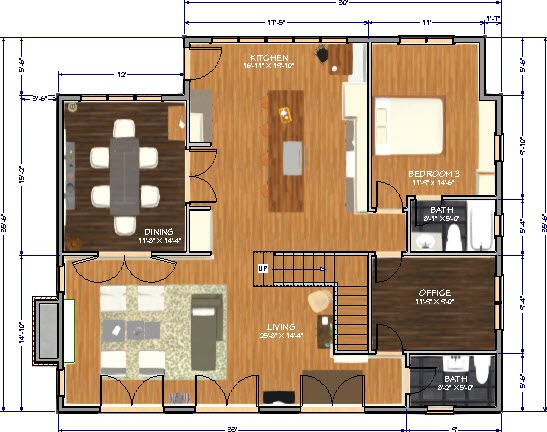
- Next, navigate to your floor plan view, and access the Display Options dialog once again to turn off any layers in the floor plan that are unnecessary to the end picture.
This is a great time to modify the color of the room labels to your liking. This can easily be done by changing the line color of the "Room Labels" display layer.
- Once the floor plan view is to your liking, send the view to a layout by selecting File> Send to Layout .
It is important that you specify the scale to be the same as the 3D camera view that you sent in Step 1 above.
- Use the Move
 edit handle along with the Point to Point Move
  tool to move the floor plan so it's aligned with the 3D camera view.
- Now you can continue to send various views to this layout and Print
 it out, or you can export it by going to File> Export> Export PDF
  or File> Export> Export Picture
  .
.
Related Articles