Applying Two Different Door or Drawer Styles to a Single Cabinet in Home Designer Pro
The information in this article applies to:

QUESTION
I would like the front of my cabinet to have two different door or drawer styles. How can I create this effect?

ANSWER
In Home Designer Pro, two different door or drawer styles can be applied within a single cabinet by accessing the Cabinet Specification dialog and modifying the face items.
You can also make the following modifications within your Cabinet Defaults if you would like these changes to be applied to new cabinets that you create in your plan.
To apply two different door or drawer styles to a cabinet
- Access the desired plan, navigate to Build> Cabinet
 , select an appropriate Cabinet tool, then click to place the cabinet in your plan.
In this example, we placed a Wall Cabinet.
- Using the Select Objects
 tool, select the cabinet, then click on the Open Object
  edit button.
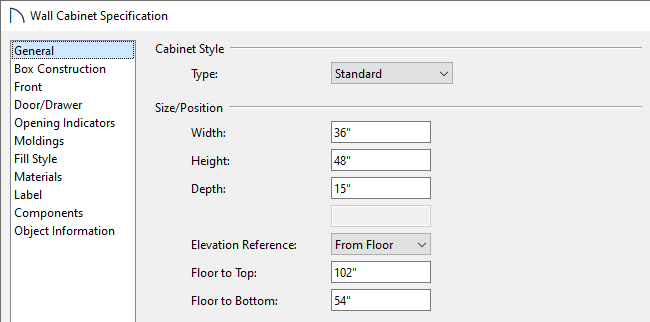
- On the General panel of the Cabinet Specification dialog that displays, specify the Width, Height, Depth, and Floor to Top/Bottom values to your liking.
In this example, the Width is set to 36", the Height is set to 48", the Depth is set to 15", and the Floor to Bottom is set to 54".
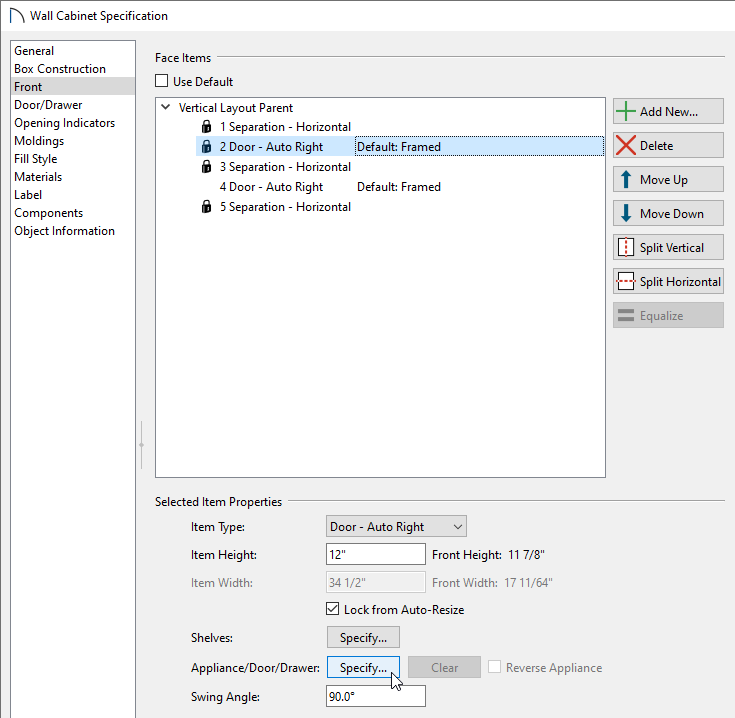
- On the Front panel, select the door or drawer Face Item that you would like to modify, then click the Specify button next to Appliance/Door/Drawer.
In this example, the 2 Door - Auto Right Face Item is selected. Notice that there are two door Face Items as part of this cabinet; we will be adjusting the upper most door in this example.
- In the Door/Drawer Face Item Specification dialog that displays next:
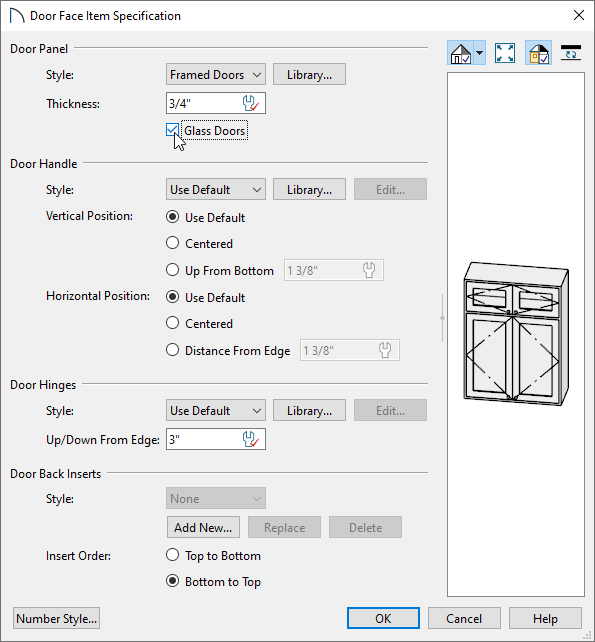
- Use the Style drop-down or click the Library button to browse the Library for a door style that matches your needs.
- Modify the other components for this Face Item, such as the Door/Drawer Handle, Door Hinges, etc.
- Once all desired changes have been made, click OK.
- Use the Style drop-down or click the Library button to browse the Library for a door style that matches your needs.
- Back in the Cabinet Specification dialog, click on any other Face Items that you would like to be different from the rest of the cabinet, and follow the steps mentioned above.
If you would like to modify more than one cabinet at a time, use the Shift key to select several cabinets and change their attributes all at once, or use the object painter to take the attributes from one cabinet and place them on other cabinets.
Alternatively, you can apply the steps mentioned above within your Cabinet Defaults so that each new cabinet placed will have two different door/drawer styles.
- Make any other desired changes to the cabinet, such as adjusting the Materials or Moldings that are applied, then click OK.
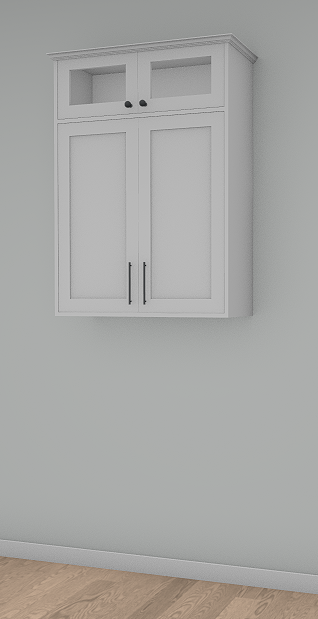
- Create a Camera
 view to see the results.
You can add a customized cabinet to the Library Browser for future use. To do this, select the cabinet and click the Add to Library edit tool to add it to the User Catalog folder.