Creating Stone Stairs
Reference Number:
KB-02984
Last Modified:
January 2, 2025
This article also applies to the following legacy products:
Pro | Architectural | Suite
Pro | Architectural | Suite
QUESTION
How do I create stone stairs in terrain?

ANSWER
To create stone stairs, you simply need to slope the terrain and then add stepping stones.
To slope the terrain
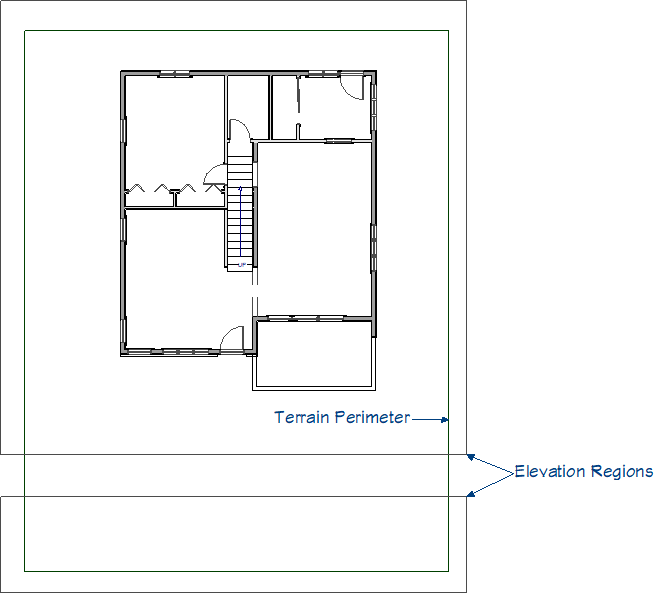
- Navigate to Terrain> Create Terrain Perimeter
 if a terrain perimeter is not already present to create a basic plot within your design.
Note: Only one terrain perimeter can exist in a plan. If the Create Terrain Perimeter tool is grayed out it means you already have a terrain perimeter generated.
- Next, navigate to Terrain> Elevation Data> Elevation Region
 , then click and drag rectangular regions that will serve as flat areas of the terrain.
In this example, two elevation regions are created. The distance between these regions will govern the slope.
- Using the Select Objects
 tool click on one of the elevation regions and then click the Open Object
  edit tool.
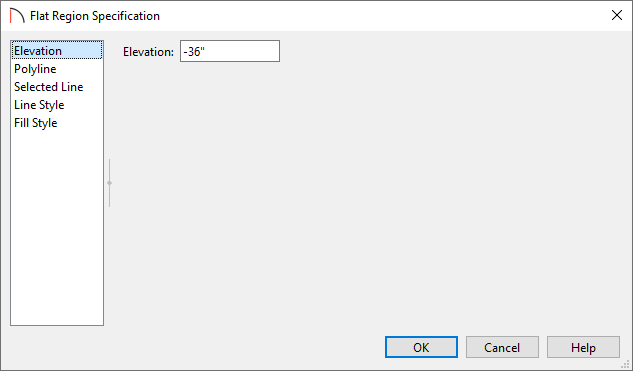
- On the Elevation panel of the Flat/Elevation Region Specification that displays, set the Elevation.
In this example, the lower region is selected and the elevation is set to -36". The upper region will remain at an elevation of 0".
- Next click Terrain> Build Terrain
 . Contour lines should appear indicating the slope.
The closer the regions are the steeper the slope. If your slope is too steep, simply move the elevation regions further apart. For this example, the regions are about 5' apart. Elevation Regions should never overlap.

To add stepping stones
- In the Library Browser
 , browse to Home Designer Core Catalogs> Exteriors> Landscaping> Rocks & Stones> Stepping Stones and choose a stepping stone for the stair.
In this example, the Irregular stepping stone is used.
- After selecting a stepping stone library object, click in the plan to place it.
- Using the Select Objects tool, select the stepping stone that was just placed, then click the Open Object edit tool.
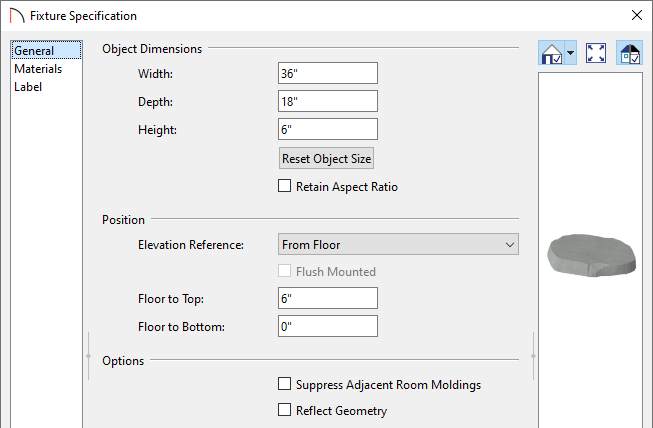
- On the General panel of the Fixture Specification dialog that displays, specify the desired Width, Depth, and Height, then click OK.
In this example, the Width is set to 36", the Height is set to 6", and the Depth is set to 18". Depending on the number of steps desired and the angle of the slope, these values may need to be modified.
- With the stone still selected, click the Copy/Paste
 edit tool, then click the Sticky Mode
  secondary edit tool.
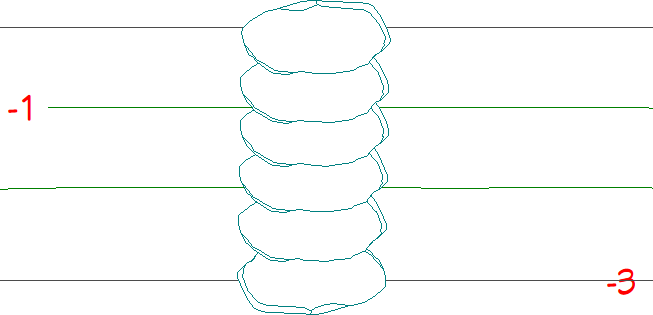
- Click within the plan until the desired number of stone steps have been placed, then click the Select Objects tool to deactivate the edit tools.
- Using the Select Objects tool once again, click on the stepping stones and move them into place using the Move
 edit handle.
The stones will automatically follow the slope of the terrain.
To overlap stones, hold down the Ctrl/Command key while you are moving a stone to temporarily disable the bumping/pushing snap setting.
Related Articles