Storage-Smart Garage
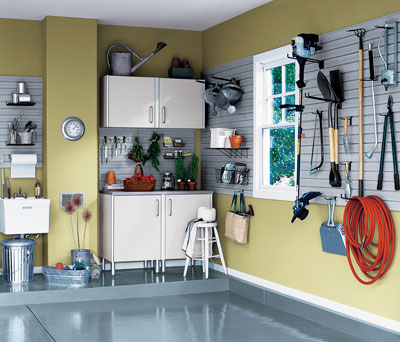
Park the car indoors! If your car spends its life out on the street or in the driveway, it’s time to cut the clutter that’s filling your garage. Let the organization experts at Better Homes and Gardens offer you some timely tips on regaining valuable space inside your garage. You’ll be happier... and so will your car.
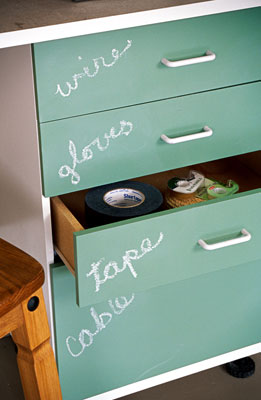
Label It
Your third-grade teacher seemed to know that writing information on the chalkboard would help you remember better and longer. Transfer that technique to the garage to keep all your stuff labeled and at your fingertips. In this case, doors and drawer fronts are coated with chalkboard paint and then labeled with white chalk.
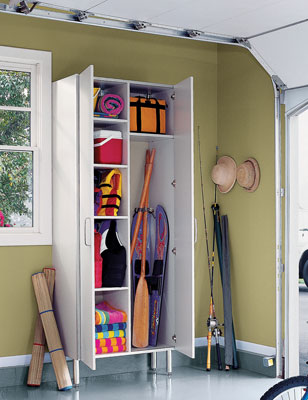
Sort by Zones
First, figure out what needs to be organized and what is just wasted material. Group your things into zones-sports, lawn, auto, home maintenance, gardening. Do you just need to store sports and garden supplies in your garage, or do you require a tool bench, too? If your garage space is limited, consider a small shed for additional items. If an item is broken or a duplicate, get rid of it. Invest in shelving and heavy-duty hooks and organize by category and use. Sorting through belongings and planning the perfect storage solutions is the toughest job.
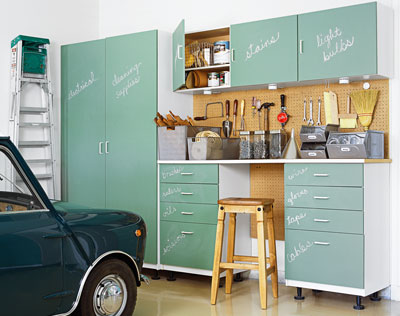
The reward? A garage whose footprint is the same size as before, but now holds more stuff and works more efficiently. Best of all, the storage patterns can be rearranged to suit a change in interests (new hobbies or seasonal tools). Just wipe and rewrite!
7 Stylish Solutions
Use these ideas as a springboard to start taming your garage clutter.
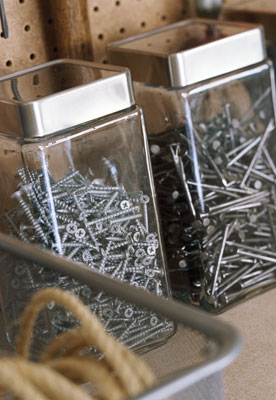
1. Hip to be square. Straight-sided containers make better use of shelf space than round ones. Clear glass reveals nails, screws, and little parts easily lost.
2. Double duty. Pullout bins allow easy access to shelved items and can be lifted to the job site.
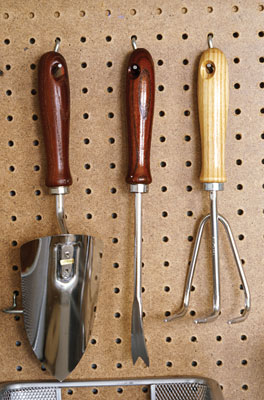
3. Hook, line, and sinker. Versatile pegboard can neatly anchor tool racks, trays, and many wire configurations with minimal effort.

4. No more tangles. Unruly items such as wire, rope, or extension cords stay neatly coiled inside trays or bins.
5. Bigger isn’t always better. Shallow drawers may be more versatile than deep ones for sorting your everyday tools and supplies into handy categories.
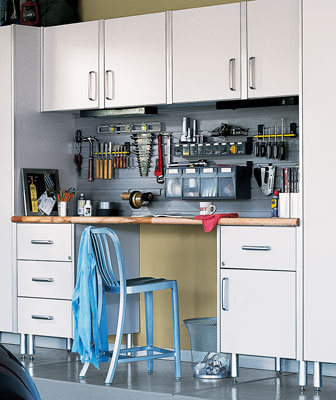
6. Hang time. Often, more time is wasted searching for the right tool than it would take to finish the job. Avoid this by spending a few hours organizing a tool workspace. First, lay out every tool you own. If you find duplicates or types you don’t like, this is the time to get rid of them. Using the "divide and conquer" method, separate the tools according to type or task. Based on how much space and how many tools you have, decide whether hanging them or stashing them in compartments makes more sense. Hang tools (and other supplies) neatly on a pegboard grid to keep them close at hand. If you’re having trouble remembering what tool goes where, trace the outline of the tool on the pegboard, and you’ll know where to put it after every use. Consider storing the basics in a portable toolbox and tucking the rest away. Invest in plastic containers with lids, labeling each according to contents. Include a spot for a tool belt; professionals know that wearing one saves countless time looking for the right hammer or screwdriver while on the job.
7. Light it up. Halogen under-cabinet fixtures ensure ample lighting for any task on your garage workstation.
More Tips!
- Use the walls and corners. Stash garden and lawn tools in a specially made container with slots.
- If dirty boots in the mudroom are a problem, add a small bench and metal tray (which cleans up easily) just outside the door that connects the garage to the house. A wire rack for bulky coats and gear comes in handy, too.
- Except for lawn mowers and other heavy-duty equipment, vow to keep the floors clear of clutter.
- Lock any dangerous chemicals or supplies, such as paint and pesticides, in a heavy-duty cabinet.
- Gather outdoor cleaning supplies in a handy plastic caddy to quickly wipe up after spills and grime – no more running in the house for paper towels and a cleaner!
- Buy weather-resistant storage or shelving that can withstand the extremes of temperature and climate.
- Get overhead space into the act with adjustable ceiling-mounted wire shelves. They make great spots for seasonal items or holiday storage.
The Sky’s the Limit
If your ceilings are high enough, hang hooks in your garage to hold bikes or lawn maintenance gear. Wall-mounted brackets are also available for bicycles and can accommodate helmets as well. If ceiling space is particularly generous, consider building a simple loft, which could easily expand the storage space by 50 percent.
A Dream Workstation
If you have enough space, turn the garage from the island of last resort into your very own organizational dreamland. Plan to use every nook and cranny-from corners to above your garage door. Hang a few shelves and include ample work surface space, and you’ll have a handy spot to pursue your outdoor hobbies or finish a painting project.
Store Paint Properly
Make sure the can lids are tightly sealed and the location is cool and dry. To get rid of latex paint, open the lid and let the can dry out. Oil-base paint should be disposed of at a hazardous waste site.
© 2008 Meredith Corporation