Placing a Picture, Painting, or Photo on a Wall
The information in this article applies to:

QUESTION
I would like to hang a picture or a painting on a wall, but when I choose a painting in my 3D view and click to place it, it applies to the whole wall. How can I apply a picture or painting in a frame on a wall?

ANSWER
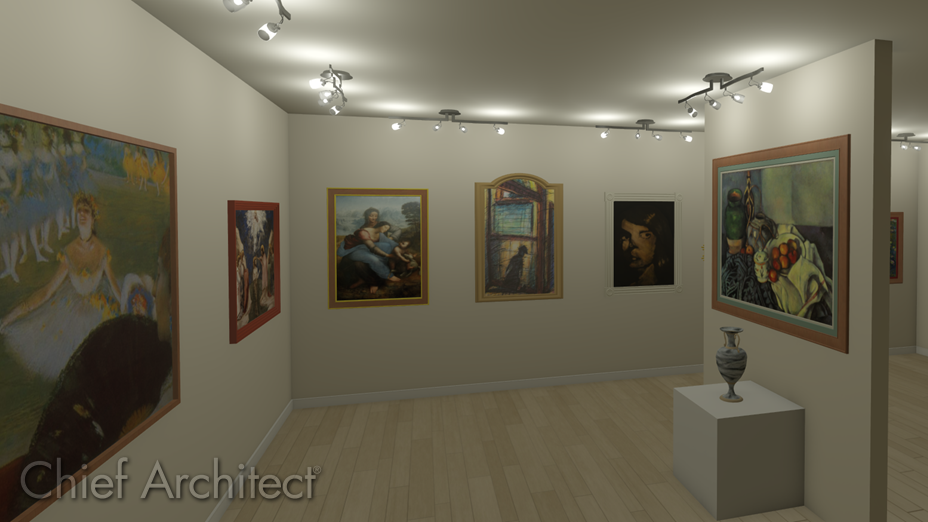
Paintings, prints and photographs are materials that can be applied to other objects, such as frames. Once a frame is placed in your plan, you can change the picture to one that you desire using the steps below.
To create a framed picture on a wall
- Select View> Library Browser
 to open the Library Browser if it's not already open, then navigate to Home Designer Core Catalogs> Interiors> Accessories> Mirrors & Frames.

- Select a frame that you would like to use, then click on a wall or a piece of furniture such as a desk or dresser to place it into the plan.
In this example, the Cathedral Frame is selected.
- Using the Select Objects
 tool, click on the newly placed frame to select, then click the Open Object
  edit button.
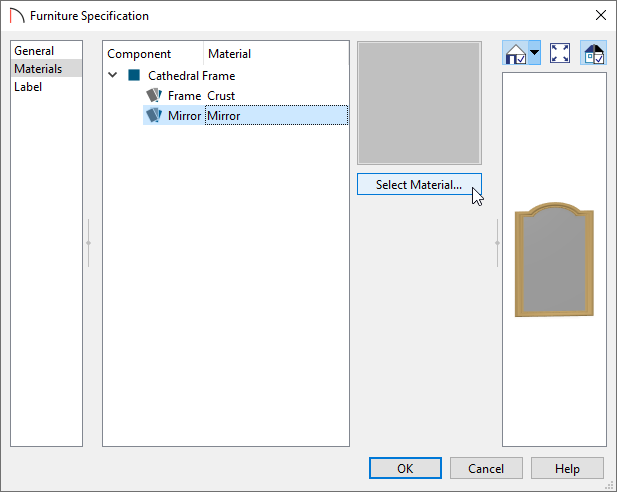
- On the Materials panel of the Furniture Specification dialog that displays, select the Mirror or Picture component in the list, then click the Select Material button.
Note: Some frame objects are designated as mirrors. These objects will have a Mirror material component instead of a Picture component, which can be changed from the mirror material to the desired artwork. Be aware that beveled mirrors will replicate the artwork material on the beveled surfaces as well as the primary mirror surface, and are not ideal for artwork materials.

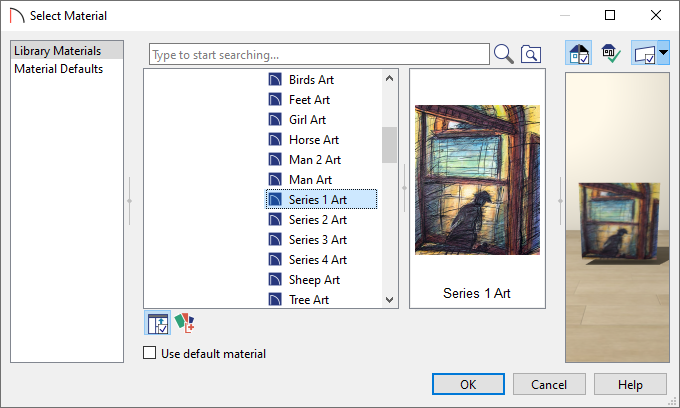
- In the Select Materials dialog, browse to Home Designer Core Catalogs> Materials> Artwork and select the desired piece of artwork.
In this example, the Series 1 Art painting is selected.
If you have imported a custom picture into the User Catalog, you can browse the library for this artwork instead. Please see the Related Articles section below to learn more on importing custom pictures and materials.

- Click OK and OK again to close all of the dialogs, then take a Camera
 view to see the results.