Modifying the Transparency of a Material
Reference Number:
KB-00164
Last Modified:
November 18, 2021
This article also applies to the following legacy products:
Pro | Architectural | Suite
Pro | Architectural | Suite
QUESTION
How can I create or edit a material to be transparent?

ANSWER
Many of the materials in the library are set up to be opaque, which means that they appear totally solid. In some situations, though, transparency can be a helpful attribute.
To change the transparency of a material
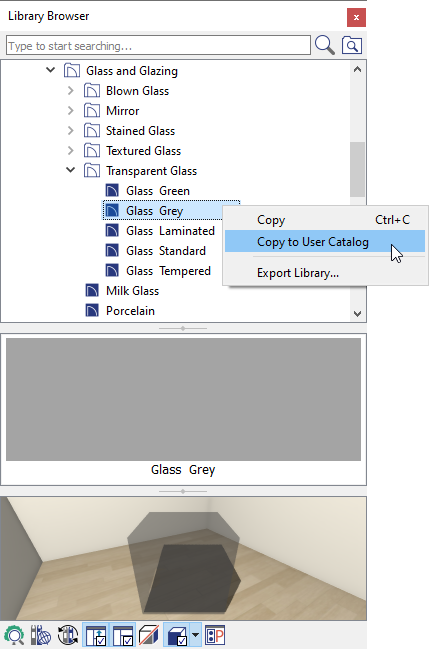
- If the material is in a Core, Bonus, or Manufacturer catalog, you will need to copy the material and paste it in to your User Catalog. To do this, right-click on the material located in the Library Browser that you would like to modify, and choose the Copy to User Catalog option.
In Home Designer 2021 and prior versions, select the Copy option from the menu instead, then right-click on the User Catalog folder and choose Paste.
Note: On a Mac, hold down the Control key while clicking to initiate a right-click command. More information about right-click commands on Apple input devices can be found in the following Apple resource: Right-click on Mac.

- Once the material is in the User Catalog, right-click or perform a secondary click on the material that was pasted or added into the User Catalog, then select Open Object
 .
.
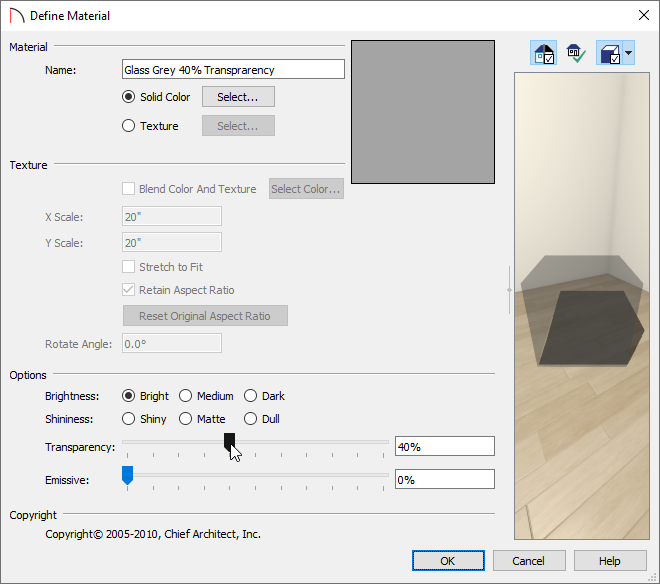
- In the Define Material dialog that displays:

- At the top of the dialog, specify your desired Material Name.
- Use the Transparency slider to adjust the amount of transparency, or enter in your desired value in the box to the right. A transparency value of 0 results in a completely opaque material, while a value of 100 creates a material that is completely invisible.
In Home Designer Architectural and Home Designer Pro, the Transparency setting is located on the Properties panel.
- Click OK to close the dialog and apply your changes.
- At the top of the dialog, specify your desired Material Name.
- When you apply this customized material to an object in your plan, it will display transparency based upon the percentage set in the step above.
Related Articles