Changing Your Dimension Settings
The information in this article applies to:

QUESTION
When I use the Auto Exterior Dimensions or Manual Dimension tools, the dimension lines do not locate walls where I want them to. How can I adjust their settings?
ANSWER
You can specify how dimensions locate walls by changing the settings within the Dimension Defaults dialog. In Home Designer Pro, you also can specify how a variety of other objects are located.
To modify the dimension defaults
-
With a plan open, select Edit> Default Settings
 , select the Dimension option, then click Edit.
In Home Designer Pro 2021 and prior versions, select Dimensions, Auto Exterior Dimensions, or Auto Interior Dimensions, then click Edit.
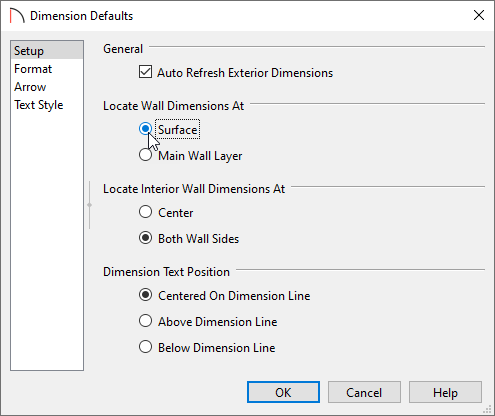
- On the Setup panel of the Dimension Defaults dialog that opens:
- Choose whether or not to have automatic exterior dimensions update or refresh any time a change is made to a wall, window, or door.
This setting is located on the Setup Automatic panel in Home Designer Pro.
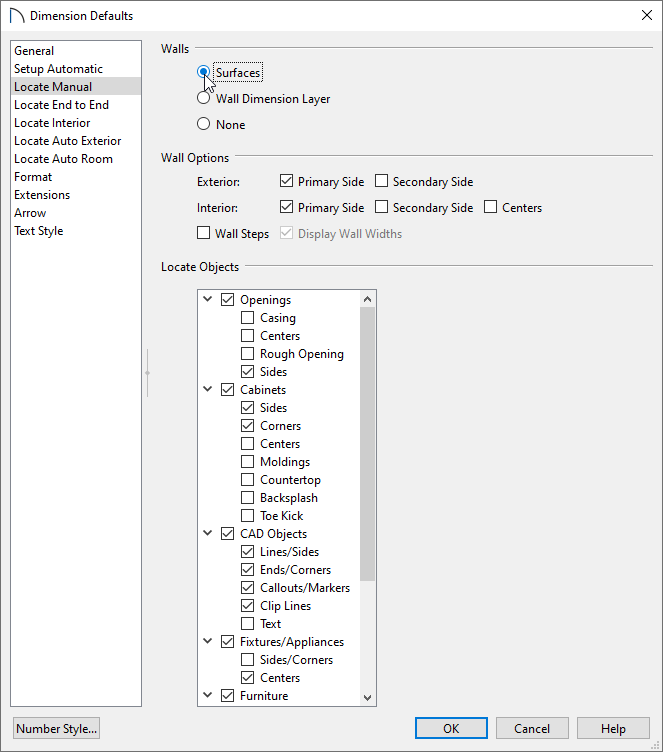
- Choose how dimensions locate walls in the plan.

In Home Designer Pro 2022 and newer versions, select each Locate... panel to change how each Dimension tool locates walls. Home Designer Pro also offers more control over locating objects such as Cabinets, CAD Objects, Furniture, Openings, Framing, and Fixtures.
in Home Designer Pro 2021 and prior versions, select the Locate Objects panel instead.

-
Choose the location of the dimension text in relation to the dimension line.
This setting is located on the General panel in Home Designer Pro.
- Choose whether or not to have automatic exterior dimensions update or refresh any time a change is made to a wall, window, or door.
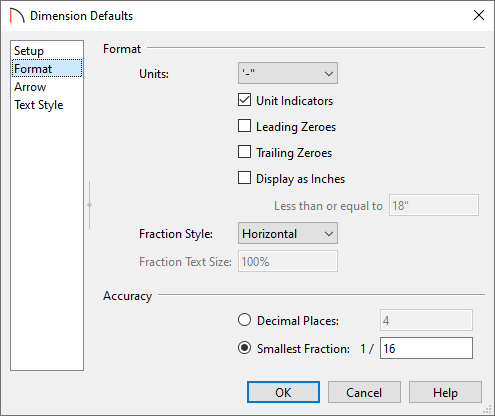
- On the Format panel, adjust the unit type and fraction accuracy.
In Home Designer 2023 and newer versions, various fractional styles are also available, including horizontal, diagonal, and vertical.

- In Home Designer Pro, an Extensions panel is available, which contains settings that control the length of extension lines.
To learn more about the extension lines that are associated with dimensions, click on the Help button located at the bottom of the dialog to open your program's documentation.
- The Arrow panel contains settings that control the size and style of dimension line arrows.
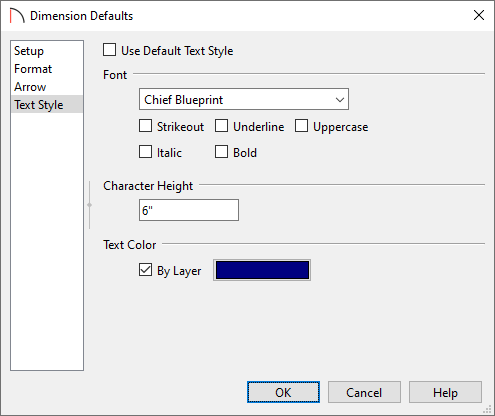
- On the Text Style panel, adjust the way the dimension text displays, such as the size, color, and font.

To learn more about the other options or settings in the Dimension Defaults dialog, click on the Help button located at the bottom of the dialog to open your program's documentation.
- Once all of your desired changes have been made, click OK, then Done to close the dialog boxes.
- Existing dimensions will update according to the changes you made, and any new dimensions that are created will take on the settings specified in the Dimension Defaults.