Creating a Two Story Entry
Reference Number:
KB-00502
Last Modified:
September 6, 2022
The information in this article applies to:

QUESTION
What is the best way to draw a two-story grand entry, or foyer?

ANSWER
In Home Designer, a two story entry can easily be created using a couple of different techniques.
To create a two-story covered entry
-
Open
 the Home Designer plan in which you would like to create a two-story entry area.
In this example, the entry area is also a bumpout.
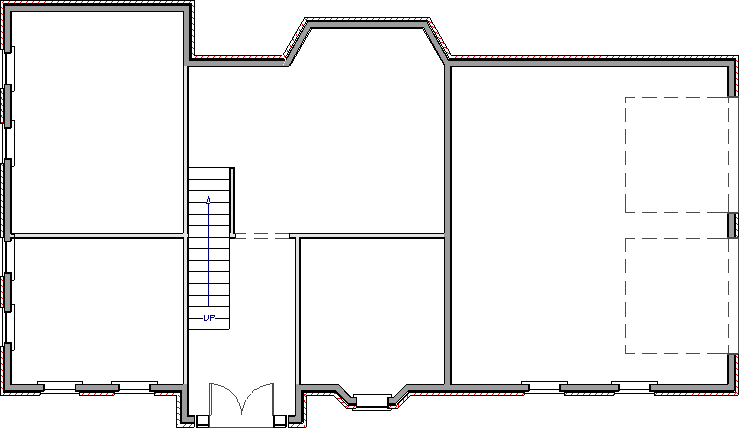
- Select Build> Wall> Room Divider
 from the menu, then click and drag to enclose a small stoop area outside of the front door.
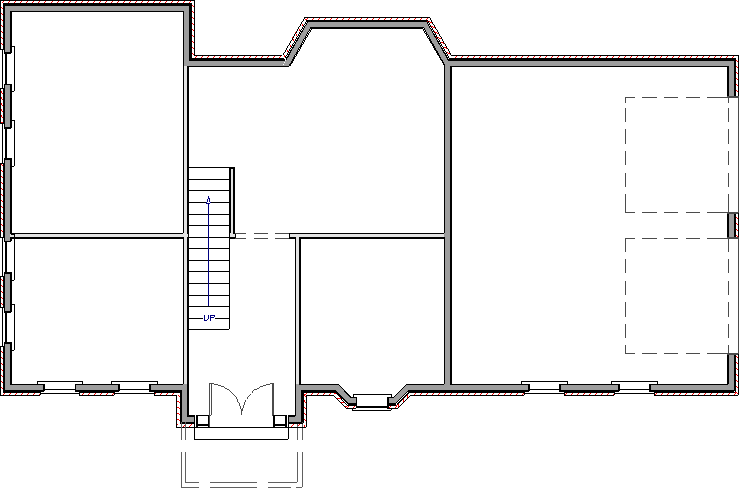
- If you would like a gable roof over your entry, select the room divider wall using the Select Objects
 tool, then click the Change to Gable Wall(s)
  edit button to convert the hip wall to a gable.
You can also select the Full Gable Wall setting on the Roof panel of the Railing Specification dialog.
- Click in the room defined by the room divider walls and click the Open Object
 edit button to open the Room Specification dialog.
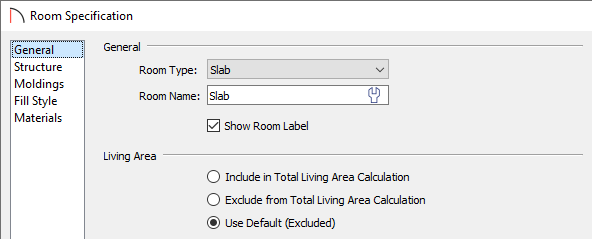
- On the General panel, select Slab from the Room Type drop-down list.
- On the Structure panel, increase the Ceiling height.
In this example, the same Ceiling height used by the rooms on Floor 2 of the plan is used.
- Also on the Structure panel, specify a lowered Floor height, if desired.
In this example, -12" is used.
- Click OK to close the dialog and apply your changes.
- On the General panel, select Slab from the Room Type drop-down list.
- Select Build> Roof> Build Roof
 from the menu and in the Build Roof dialog:
- Specify the desired Pitch (in 12) and any other roof characteristics you want.
- Click OK to close the dialog and generate a roof.
In Home Designer Pro, check the Build Roof Planes box prior to clicking OK.
- Specify the desired Pitch (in 12) and any other roof characteristics you want.
- The roof can now be supported by columns from the library. If it's not already open, select View> Library Browser
 from the menu, then type the word "column" in the Search field, or browse to Home Designer Core Catalogs> Architectural> Millwork.
In this example, two Round Columns are used.
- Click to place columns near the front corners of the stoop area, then select each of them one at a time and move them into position.
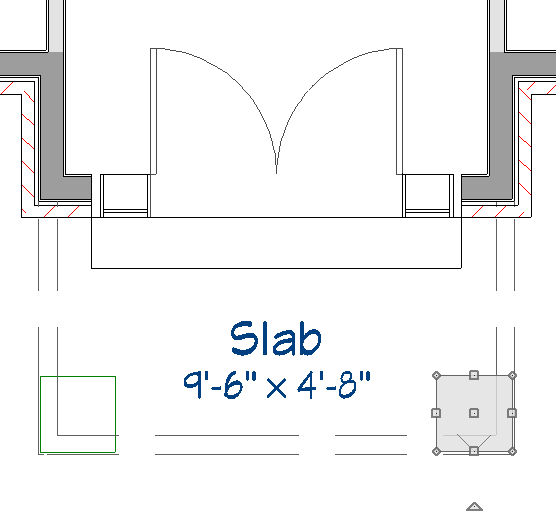
- Finally, Open the columns up to specification and increase their Height until they meet the roof.
Note: You can also adjust the height of the columns in a 3D camera view.
A different approach to creating a two story space can be applied on the inside of the structure.
To create a two story foyer
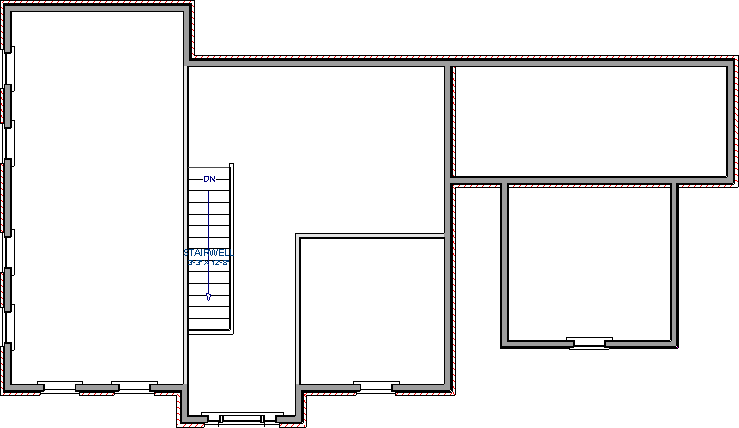
- If an entry staircase is present, click on it using the Select Objects tool to select it, then click the Auto Stairwell
 edit button.
- Click on the Up One Floor
 tool to go up to the floor above and notice that a Stairwell room has been created over the stairs.
Note: Stairwell rooms use the "Open Below" room type and do not have floor platforms.
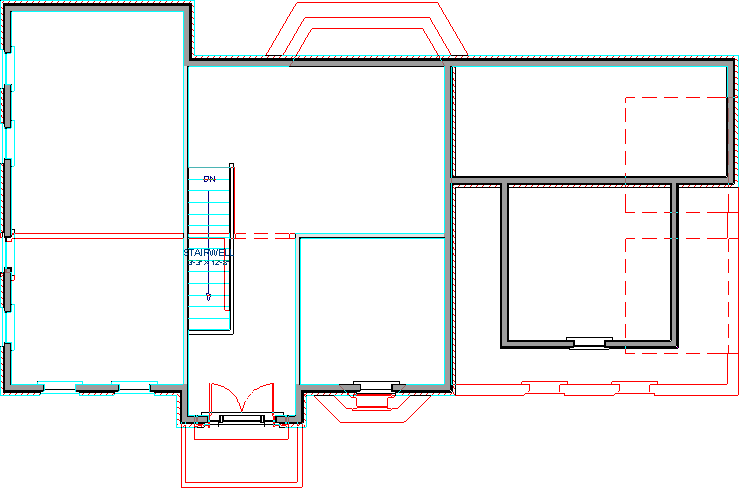
- Select Tools> Floor/Reference Display> Reference Floor Display
 from the menu to see the position of the walls that are placed on the floor below.
- Select Build> Wall> Interior Wall
 from the menu, then click and drag to draw walls to define the upper part of the two-story foyer space.
If you would like a balcony, draw one or more of the walls defining the foyer area using Railings instead.
- Walls or railings drawn over other walls shown in the Reference Display will snap into position and be aligned with the reference walls. To confirm that they are aligned:
- Select each wall or railing on Floor 2 and look for the Align With Wall Below
 button on the Edit toolbar.
- If the button is available, click it; if it is not, then the wall or railing is already aligned or is too far from walls/railings on the floor below.
- Select each wall or railing on Floor 2 and look for the Align With Wall Below
- When you are finished, you can select Tools> Floor/Reference Display> Reference Floor Display again to turn the Reference Display off.
- Select and resize, or delete the railings defining the original Stairwell room, as needed, to define the foyer area to your liking.
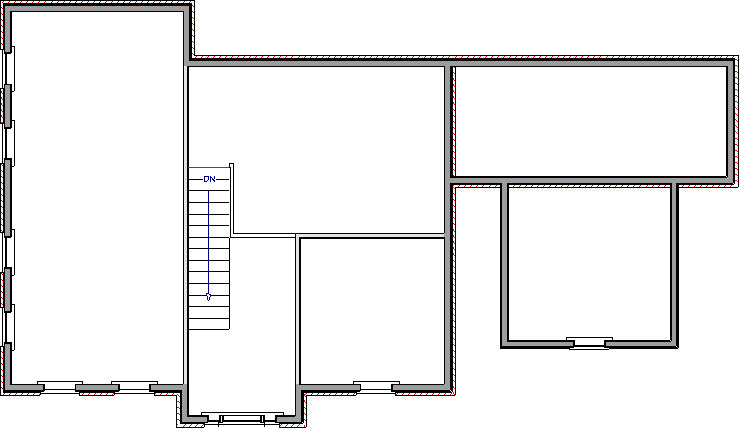
- Using the Select Objects tool, click in the room defining the foyer area to select it and click on the Open Object edit button.
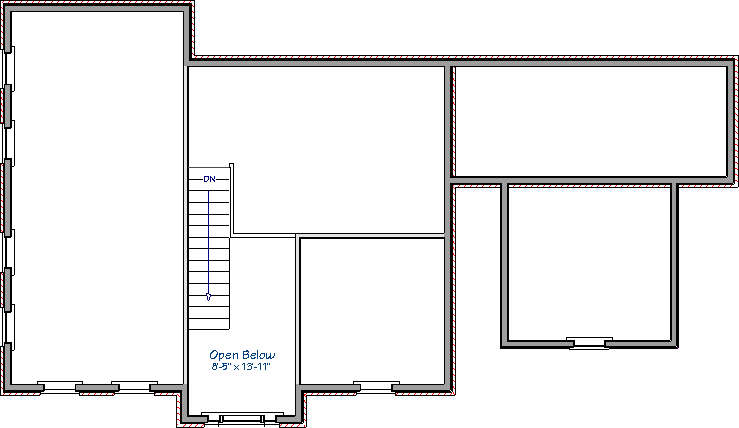
- On the General panel of the Room Specification dialog that displays, select "Open Below" from the Room Type drop-down list if it's not already specified, then click OK.
-
Finally, create a Camera
 view of the interior to see the results.