Changing the Display of Object Labels
Reference Number:
KB-00504
Last Modified:
October 6, 2021
The information in this article applies to:

QUESTION
My object labels are not visible. How can I display these labels, and once visible, how can I change the font, size, and color of the label text?
ANSWER
Labels can be toggled on and off using the Display Options. To adjust the font, size, color, and other properties associated with object labels, access the Default Settings.
To toggle the display of object labels
-
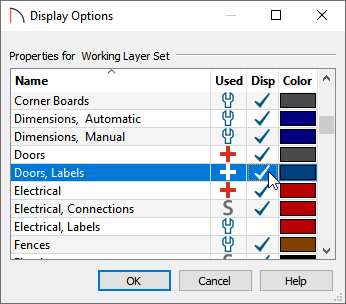
While in the 2D floor plan view, select Tools> Display Options
 .
.
- Locate the layers that contain the word "Labels" in the name, then put a check in the Disp column to show these layers in the current view.
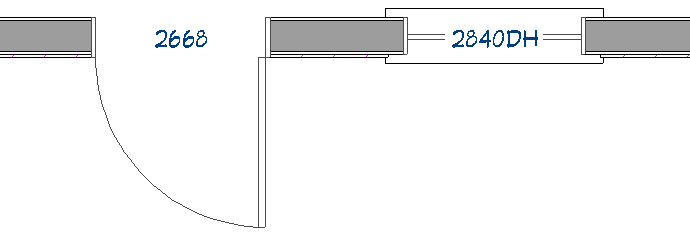
In this example, we have displayed the "Doors, Labels" and "Windows, Labels" layers.

- Click OK to confirm the changes.
- Labels for any layers that you've set to be displayed will now be visible in the view.

To adjust the font, size, and color of labels
- Select Edit> Default Settings
 .
.
- In the Default Settings dialog, click on the Text Styles option, then click the Edit button.
In Home Designer Pro, expand the Text, Callouts and Markers category located in the Default Settings to access Text Styles.
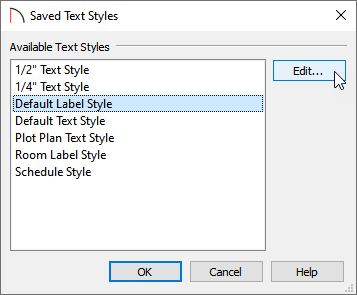
- In the Saved Text Style Defaults dialog, select the Default Label Style, then click the Edit button.

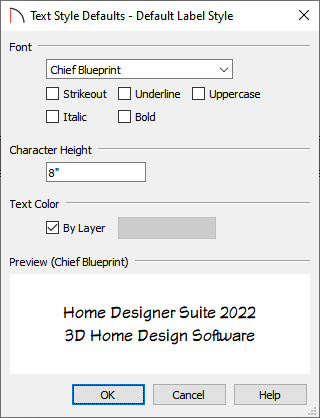
- In the Text Style Defaults - Default Label Style dialog, you can adjust the display of text labels, including the Font, Character Height, and Text Color.
In this example, we have increased the Character Height to 8".

- Click OK to apply this change, then click OK again, then Done to exit out of all of the dialogs.
- All labels in the plan will update according to the changes that were made.