Printing a View to Span Multiple Pages
Reference Number:
KB-00812
Last Modified:
November 18, 2021
The information in this article appliesto:

QUESTION
I would like to print my plan spanning multiple sheets of paper. How can I do this?
ANSWER
When printing your plan file, you have two scaling options: you can direct the program to scale the drawing so that it fits on your selected printer paper size, or you can specify a particular drawing scale.
If the drawing scale that you wish to use does not permit the drawing to fit on the selected printer paper, you can print to multiple pages, and even specify what prints on each page by following the steps below.
To print to multiple pages
- Select File> Open Plan
 from the menu and open a plan file that you would like to print.
- Select File> Print> Drawing Sheet Setup
 from the menu.
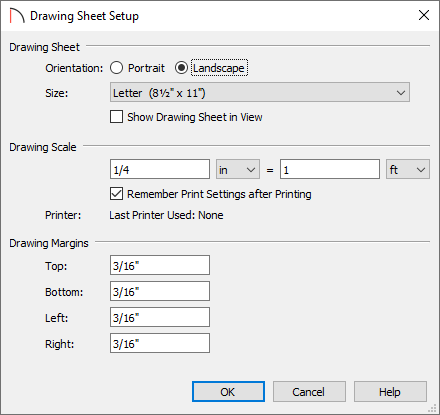
- In the Drawing Sheet Setup dialog that appears:

-
Specify your desired Drawing Sheet Orientation and choose a Size supported by your printer.
- Specify the desired Drawing Scale.
- Click OK to apply the changes and close the dialog.
-
Specify your desired Drawing Sheet Orientation and choose a Size supported by your printer.
- Select Window> Fill Window
 so that the entire plan fills the drawing area.
- Select File> Print> Print Preview
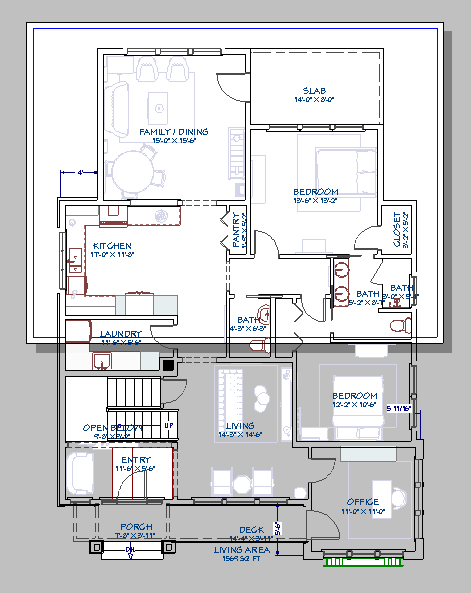
 . This makes the paper display as a white rectangle on a gray background.
Note: Your plan, depending on its size, may not fit on the paper at your currently set scale.

- Using the Select Objects
 tool, click near any edge of the white Drawing Sheet to select it.
When the Drawing Sheet is selected, an edit handle displays at its center. Click and drag the Move edit handle to move the sheet under the first portion of your plan that you would like to print.
- When you are satisfied with the position of the Drawing Sheet, select File> Print> Print
 from the menu.
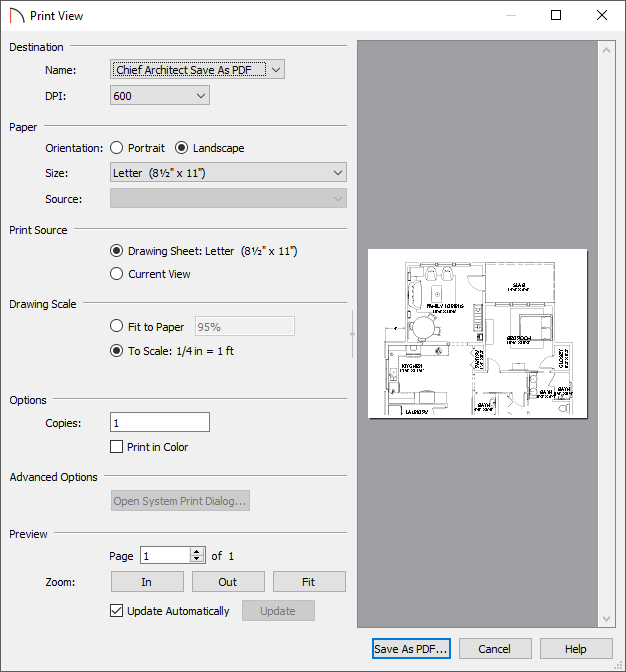
- In the Print View dialog:

- Ensure that the Destination Name, as well as the Paper Orientation and Size are setup to your liking.
- Under the Print Source section, click the radio button beside Drawing Sheet.
- Under the Drawing Scale section, click the radio button beside To Scale.
- Click OK to close the dialog and print the page.
- Ensure that the Destination Name, as well as the Paper Orientation and Size are setup to your liking.
- Repeat steps 6 through 8 until the entire plan is printed.
Related Articles