Creating a Bank of Drawers in a Cabinet
The information in this article applies to:

QUESTION
When I place a base cabinet in my plan, it has a drawer on top and a door on the bottom. How can I create a bank of drawers instead?

ANSWER
You can easily create a bank of drawers within a base cabinet, full height cabinet, or a wall cabinet.
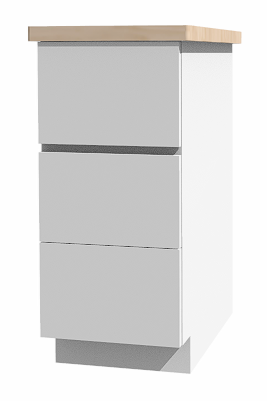
In this example, we will be creating a bank of drawers that will be placed beside a washer and dryer unit, as shown in the image above.
To create a bank of drawers
- Navigate to Build> Cabinet
 from the menu, then select the Base Cabinet
  , Wall Cabinet
  , or Full Height
  tool.
tool.
In this example, a Base Cabinet is used.
- Click in your plan to place a cabinet at the desired location.
- Using the Select Objects
 tool, click on the cabinet to select it, then click the Open Object
  edit button.
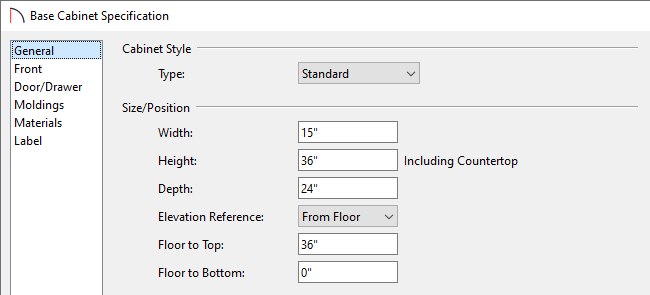
- On the General panel of the Base Cabinet Specification dialog, specify the desired Width, Height, and Depth of the cabinet.
In this example, the Width is changed to 15", while the other values remain unchanged.

- On the Front panel:

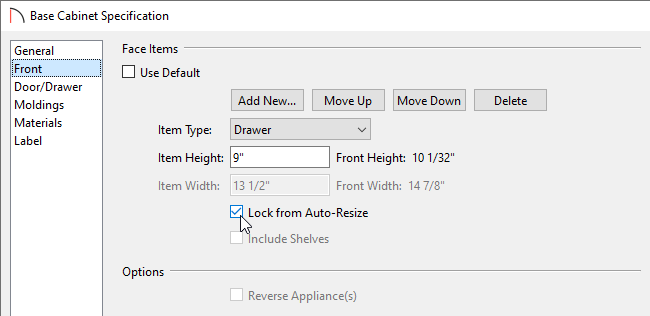
- Click on the drawer at the top of the cabinet using the 3D preview on the ride side of the dialog, then specify your desired Item Height. Ensure that the Lock from Auto-Resize setting becomes checked after specifying a custom value.
In this example, a value of 9" is specified for the top drawer.
- With the top drawer still selected/highlighted, click on the Add New button. A New Cabinet Face Item dialog will display where an Item Type and Item Height can be specified.
In this example, an Item Type of Blank Area and an Item Height of 3/4" is specified.
Note: When clicking the Add New button on this panel of the dialog, any new face items that are added are applied directly below the currently selected face item.
- Next, we will click on the existing door in the 3D preview on the right side of the dialog, and use the Item Type drop-down to specify it as a Drawer. Specify the desired Item Height for the newly converted drawer and again, verify that the Lock from Auto-Resize setting becomes checked.
In this example, a value of 8 1/2" is specified.
- Click on the remaining empty/blank area beneath the second drawer using the 3D preview, and specify its Item Height.
In this example, a value of 8 1/2" is specified.
- Click on the drawer at the top of the cabinet using the 3D preview on the ride side of the dialog, then specify your desired Item Height. Ensure that the Lock from Auto-Resize setting becomes checked after specifying a custom value.
- On the Door/Drawer panel:

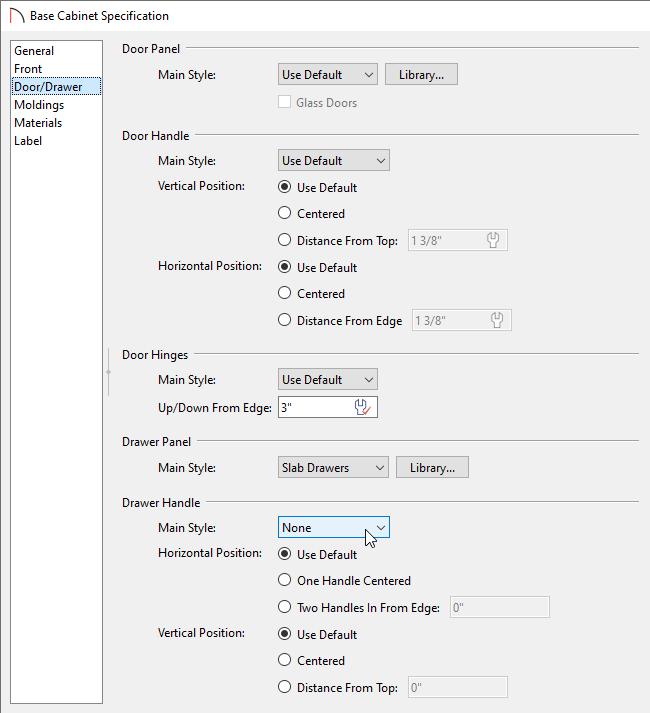
- Specify the desired Drawer Panel Main Style using the drop-down menu or by clicking on the Library button.
In this example, Slab Drawers are used.
- Specify the desired Drawer Handle properties.
In this example, the Main Style has been set to None which removes the hardware from all drawers that part of the cabinet.
- Specify the desired Drawer Panel Main Style using the drop-down menu or by clicking on the Library button.
- Customize the Moldings and Materials of the cabinet to your liking, then click OK.
- Select 3D> Create Camera View> Full Camera
 from the menu, then click and drag a camera arrow towards your cabinet to see the results.
In Home Designer Pro, navigate to 3D> Create Perspective View> Full Camera instead.

If you plan to use more than one bank of drawers in your plan, customize a cabinet as desired, then use the Copy/Paste tool to quickly make as many copies of it as you need. You can also add a custom cabinet to your User Catalog for future use.