Creating a Home Theater Room
The information in this article applies to:

QUESTION
What are some tips for creating a custom home theater room in Home Designer?
ANSWER
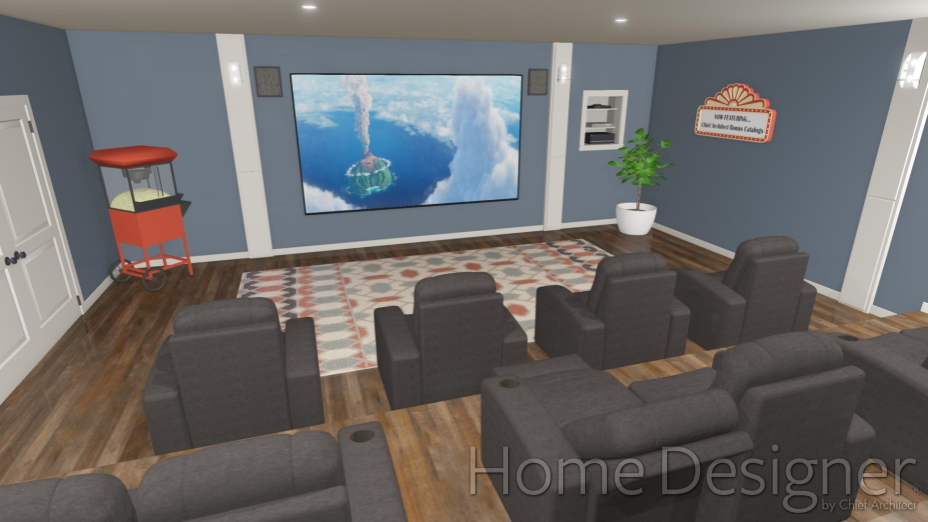
Home theaters, or media rooms, often incorporate some of the same features as public theaters, such as a stepped floor, atmospheric lighting, and decorative elements such as pilasters and sconces. Many home theaters also have wall niches for Blu-ray players and other electronics.
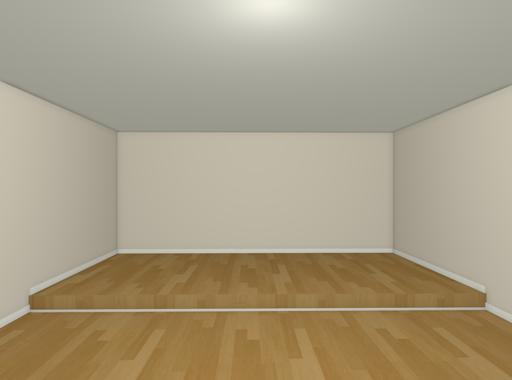
In this example, we will create a home theater room with a raised seating area. This example starts with a 20' by 26' building.
To create a stepped floor
- Select Build> Wall> Room Divider
 , click and drag to draw an invisible room divider wall across the entire room, dividing it into two sections.
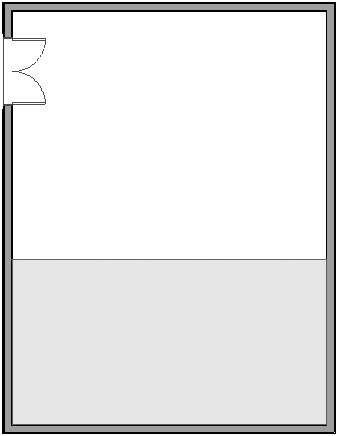
- Using the Select Objects
 tool, click in the room area that you would like to have a raised floor and click the Open Object
  edit button.
- On the Structure panel of the Room Specification dialog:
- Change the Floor value to 8" and press the Tab key on your keyboard.
Note: Notice that the Finished Ceiling Height decreases by 8". This means that although the floor will be stepped, the ceiling will remain a single plane at a constant height. -
- Click OK to close the dialog and apply your changes.
- Change the Floor value to 8" and press the Tab key on your keyboard.
- Select 3D> Create Camera View> Full Camera
 from the menu, then click and drag a camera arrow in the room towards the raised floor to see the results.
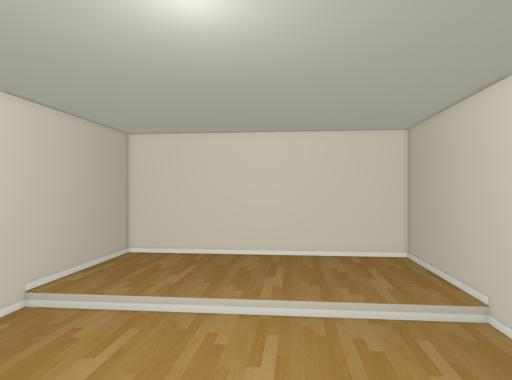
- To return to floor plan view, select File> Close View from the menu.
- If you would like to have different material for the step, or different base molding along the bottom of the step, select Build> Cabinet> Soffit
 from the menu, then click once near the invisible wall in floor plan view to place a soffit.
- Use the edit handles to resize the soffit so that it stretches across the room, just like the invisible wall.
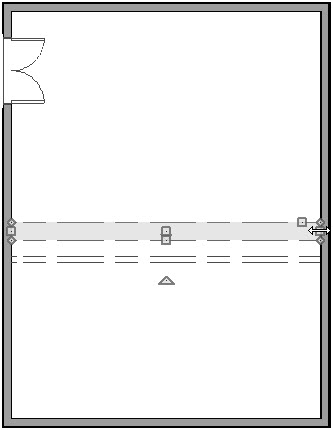
- With the soffit still selected, click the Open Object
 edit button.
- On the General panel of the Soffit Specification dialog, set the Height to 8”, the Depth to 1”, and the Floor to Bottom to 0".
- On the Materials panel, select the material that you are using for your walls or for your flooring, then click OK to close the dialog and apply your changes.
- Use the Move
 edit handle to move the soffit so that it is just in front of the invisible wall.
If the soffit is located inside the room with the raised floor, it will be placed on top of that floor instead of serving as the front surface of the step.
- If you want a different molding, select the Soffit, click the Open Object
 edit button to display the Soffit Specification dialog, and on the General panel place a check in Ignore Room Moldings, then click on the Moldings panel and add your desired molding profile.
- Select 3D> Create Camera View> Full Camera
 to see the results.
To create a wall niche or alcove
- Select File> Close View from the menu to return to floor plan view.
- Select Build> Door> Doorway
 from the menu, then click on a wall at the location where you would like to create a wall niche.
- Select 3D> Create Camera View> Elevation
 from the menu, then click and drag a camera arrow directly at the doorway.
In Home Designer Pro, select 3D> Create Orthographic View> Wall Elevation .
.
- In the camera view, click the Select Objects
 button, then click on the doorway casing to select it. Using the edit handles, resize the doorway until it is the desired size and height above the floor.
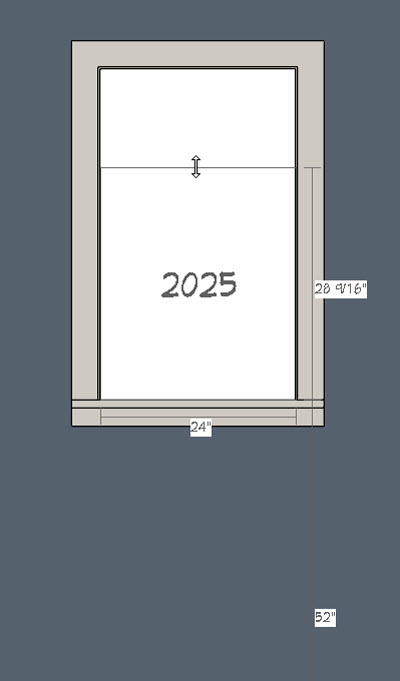
- Make a note of the height of the bottom edge of the doorway.
- In this example, the bottom edge is 52" above the floor.
- Make a note of the height of the bottom edge of the doorway.
- Select File> Close View from the menu to return to floor plan view.
- Select Build> Cabinet> Shelf
 from the menu, then click to place a shelf behind the doorway. You can then select the shelf and use the Move
  edit handle while holding Command/Control key on your keyboard, to move the shelf however you would like within the doorway. You can also use the side edit handles to make the shelf span the width of the doorway and make the shelf as deep as you want.
- Click on the shelf to select it, then click the Open Object
 edit button.
- On the General panel of the Shelf Specification dialog:
- Specify the desired Width, Depth and Floor to Bottom values of the shelf.
- The Floor to Bottom value should be equal to the height of the doorway's bottom edge minus the shelf's Height. In this example, 52" - 3/4" = 51 1/4". Depending on how you place the shelf, you may need to add another 8" (the height increase of the raised floor) to this value to align it with your doorway.
- Specify the desired Width, Depth and Floor to Bottom values of the shelf.
- Repeat these steps to produce the desired number of shelves at the necessary heights.
- In this example, a total of three shelves are created spaced 8" apart.
- Select Build> Wall> Interior Wall
 and draw walls around the niche shelves.
- Select 3D> Create Camera View> Full Camera
 to see the results.
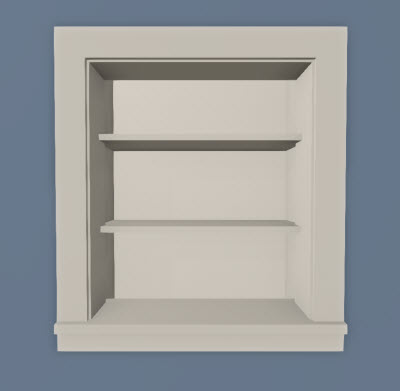
Use the Material Eyedropper and Material Painter tools to apply wall and trim materials to the shelves and niche walls.
Now your theater room is ready for furnishings, lighting and accessories.
To furnish the room
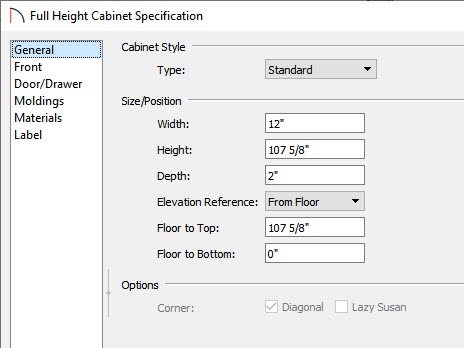
- The pilasters on the walls are made with Full Height Cabinets. In this example, their Height is equal to the floor to ceiling height of the room; the Width is 12" and the Depth is 2". The top cabinet front item is specified as a 60" high Door - Panel and the bottom, a single Drawer. The Door Handle and Drawer Handle have both been set to None.
- Sconces and recessed ceiling lighting are available in the Library Browser at Architectural> Lighting.
- A wide variety of home electronic items can be found in the Interiors library category.
- In this example, the image on the TV screen is a custom material created using a .jpg file.
- Theater seating and other decor can be found in the Bonus Catalog: Recreation No.2 Theater and Music.
