Importing a DWG or DXF File into Home Designer
The information in this article applies to:

QUESTION
I have a 2D DWG file that I'd like I'd like to import into Home Designer. How can I do this?
ANSWER
Use the Import Drawing Assistant to import CAD or terrain/elevation information directly from a DWG or DXF file.
It's important to note that, apart from terrain/elevation information, CAD that is part of a DWG or DXF file will be imported as two-dimensional components, such as lines, text, arcs, and polylines, and cannot be converted to 3D. You can, however, use the various Home Designer tools to trace over imported CAD components if you would like to create a 3D structure based on the imported information. Please see the "Tracing Over an Imported File to Create a 3D Floorplan" resource in the Related Articles section below to learn more.
In Chief Architect Premier and Chief Architect Interiors, certain 2D CAD components can be converted into walls, railings, windows, and doors. Please see KB-00170: Using CAD to Walls from an Imported DWG/DXF to learn more.
If you're interested in upgrading to Chief Architect Premier or Chief Architect Interiors, please contact our Sales team.
To import a DWG or DXF file
- Open Home Designer and create a New Plan
 file.
file.
- Navigate to File> Import> Import Drawing (DWG, DXF)
 .
.
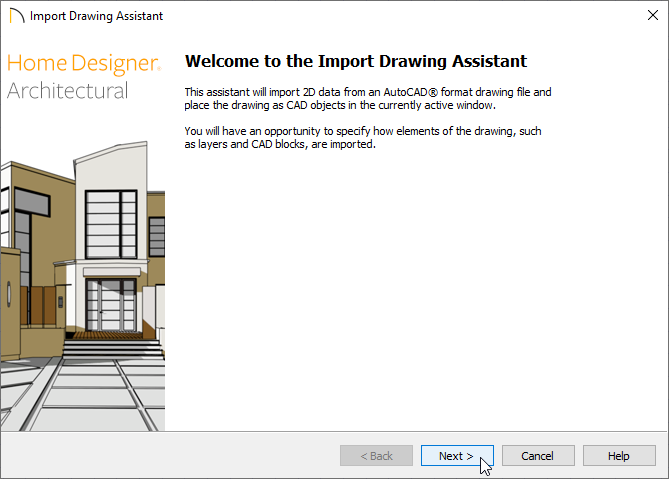
- On the Welcome screen that displays, click Next.
- On the Select File screen, click the Browse button, locate the DWG or DXF file that you want to import, then click Open. The selected file, including the file path, will now be listed in the assistant.
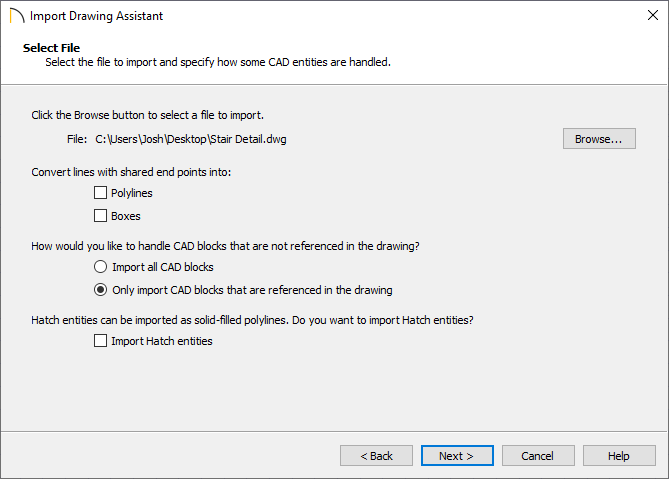
- If you want to convert lines with shared end points to polylines and/or boxes, check the appropriate boxes. Polylines are not affected by these settings, nor are lines that do not share end points.
- Choose how to handle CAD blocks. The Import all CAD Blocks option will import all CAD blocks associated with the file whether they are in use or not, while the Only import CAD blocks if they are referenced in the drawing option will reduce the volume of transferred data.
- Check Import Hatch entities if you want to import areas of hatching as solid-filled polylines.
- Click Next to continue.
- If you want to convert lines with shared end points to polylines and/or boxes, check the appropriate boxes. Polylines are not affected by these settings, nor are lines that do not share end points.
- On the Select Layers screen, choose what layers you would like to import using the checkboxes located in the Layer Name column. If you would like to convert a layer contained in the DWG or DXF file into Elevation Data or a Terrain Perimeter, select the appropriate layer from the list, then use the Convert Selected Layer(s) to drop-down menu to choose either the Elevation Data or Terrain Perimeter option.
Click Next to proceed.
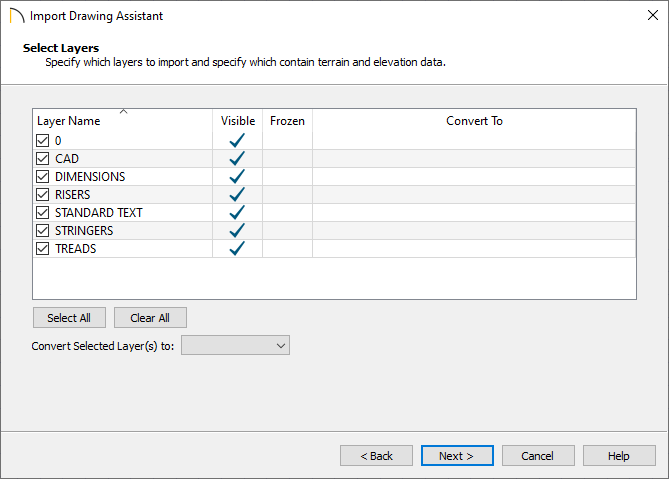
Note: If an imported layer is converted to Elevation Data, any points and lines on that layer are converted to Elevation Points and Lines, and any elevation data associated with them is preserved.
- If any imported line has vertices with the same Z values, an Elevation Line is created.
- If the vertices have differing Z values, an Elevation Point is created for each vertex.
- Imported points are converted to Elevation Points.
- Other imported entities (solids, faces, etc.) are imported normally
To avoid unexpected results when importing a DWG or DXF file, only convert layers with elevation information to Elevation Data.
If a Terrain Perimeter does not exist in the plan, or if a layer in the DWG or DXF file is not converted to a Terrain Perimeter, a Terrain Perimeter is created around the extends of the Elevation Data when it's imported.
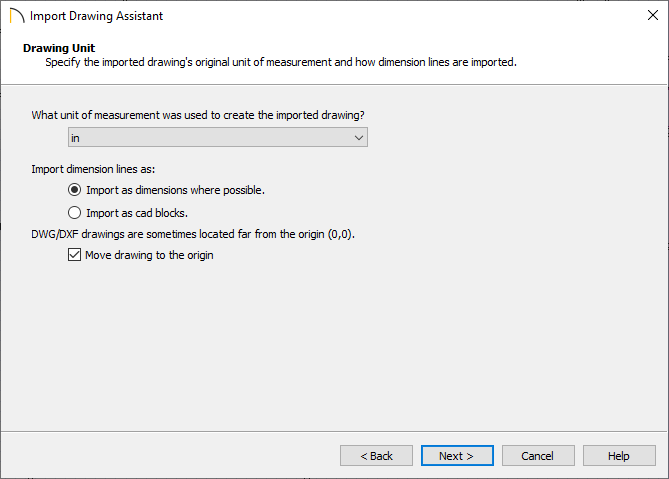
- On the Drawing Unit screen, choose the unit of measurement that was used to create the DWG/DXF file, choose how dimensions should be imported, then ensure that the Move drawing to the Origin box is checked.
- Click Next, then click Finish to import the file into your plan.